Soda Bread: Step By Step How To Make It
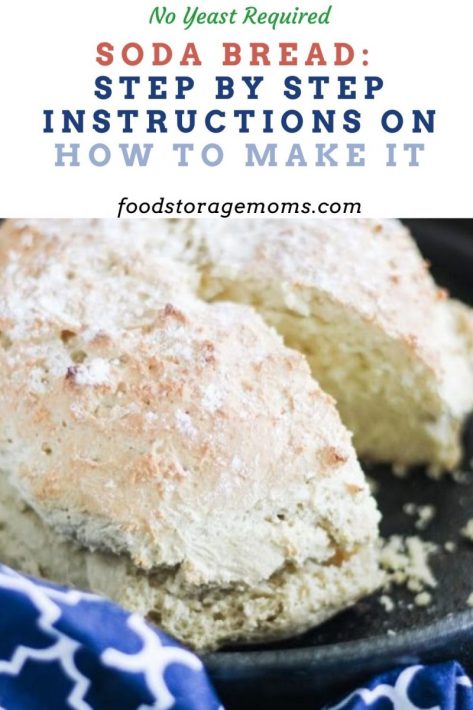
This soda bread is fantastic for those new to bread making. It doesn’t need yeast as yeast was scarce a few years ago. Here again, this bread doesn’t require yeast. It’s a simple bread recipe that just about anyone can make with ease and confidence. Soda bread is also a St.Patrick’s Day tradition, so you’ve got plenty of time to practice making the bread before that fun holiday!
You can make this bread with seven simple ingredients, which we all should have in our pantry and refrigerator. This means we can make this easy bread for family and friends at the last minute.
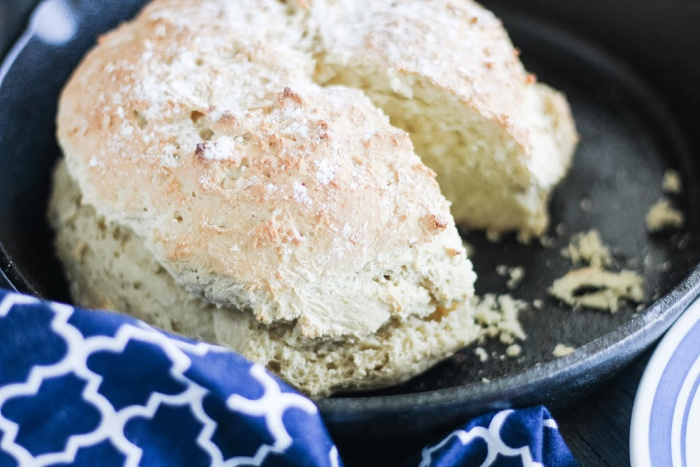
It’s crusty on the outside and moist on the inside. I call it my easy soda bread, which anyone can make.
Given what is happening with the price of food these days, we must learn ways to stretch our food budget. I think it’s only going to get worse. I hope I’m wrong, but I don’t think so.
Kitchen Items Needed
- Cast iron skillet or cookie sheet
- Mixing bowl
- Measuring spoons and cups
- Mixing spoon
- Parchment paper
How To Make Soda Bread
Step One
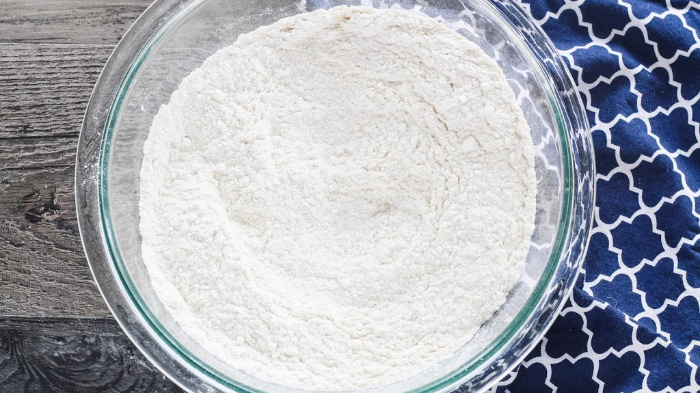
Preheat the oven to 400°F (204°C). Grease a 9-inch cast-iron skillet with butter. (You can also use a cookie sheet.) Mix the dry ingredients: flour, baking soda, salt, and sugar in a large bowl. Note that I like using bread flour rather than all-purpose flour.
Step Two
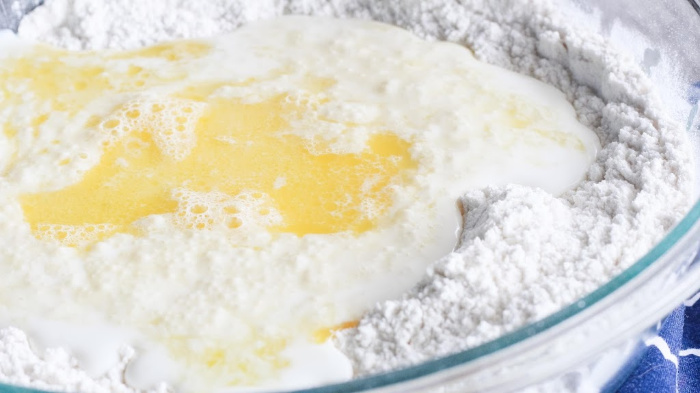
Form a well in the center of the mixture. Add the egg, buttermilk, and melted butter. Stir until mixed thoroughly; the dough will become sticky.
Step Three
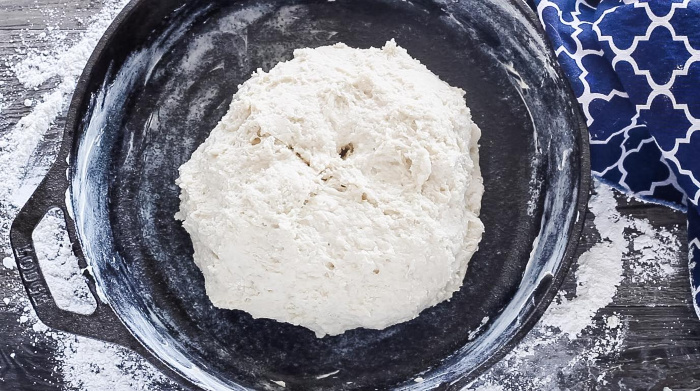
Make a flowered work surface by spreading flour on the countertop, and then use your hands to mold the dough into a round shape. The flour mixture dough will stick to the countertop if you haven’t made a lightly floured surface. Place the dough in the cast-iron skillet. Most of us are used to cooking our bread loaf in a bread pan; this recipe is different. Use a knife to cut an X or deep cross on the top of the dough. Sprinkle a tiny amount of flour on the dough.
Step Four
Bake in the oven for 35-40 minutes, or until done. If the bread sounds hollow on the bottom when tapped, it’s done.
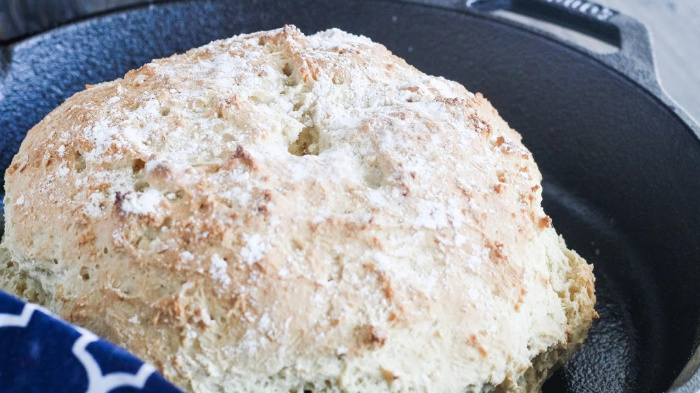
Step Five
Let the bread rest on a cooling wire rack until it cools. Slice with a sharp knife and enjoy.
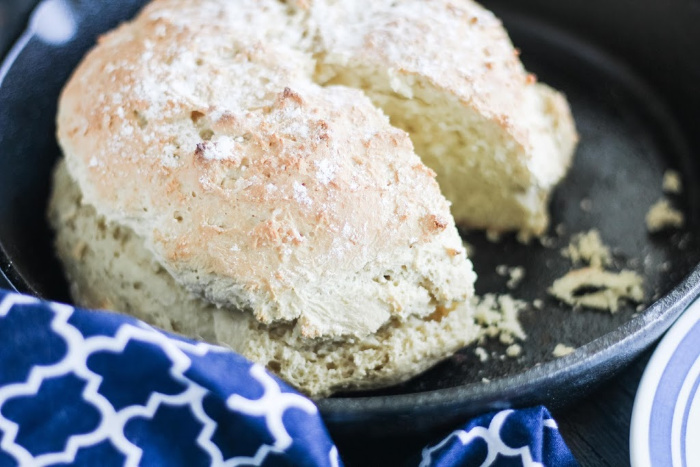
Step Six
Serve warm with butter and your favorite topping like honey, jam or jelly, and peanut butter.
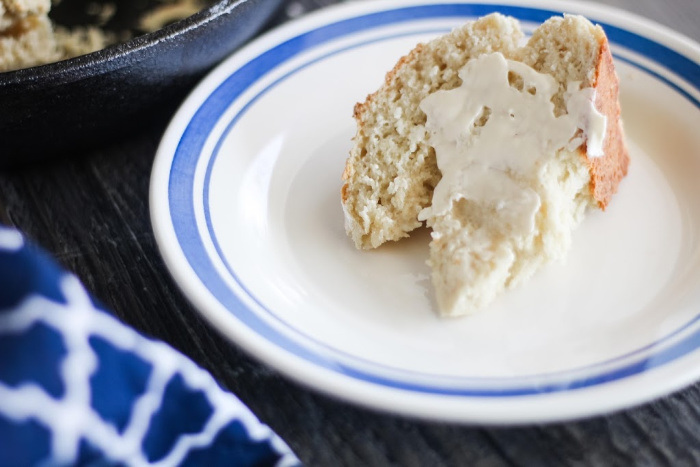
Soda Bread Recipe
- 4 cups white flour (I use bread flour)
- 1 teaspoon baking soda
- 2 teaspoons salt
- 2 tablespoons sugar
- 1 egg (slightly beaten)
- 1-3/4 cup buttermilk
- 2 tablespoons melted butter
-
Preheat the oven to 400°F (204° C).
-
Grease a 9-inch cast-iron skillet with butter. (You can also use a cookie sheet)
-
Use a bowl to mix the flour, baking soda, salt, and sugar.
-
Make a well in the center of the mixture.
-
Add the egg, buttermilk, and the melted butter. Stir until mixed thoroughly, the dough will become sticky.
-
Sprinkle flour on the countertop and use the flour on your hands to mold the dough into a round shape.
-
Place the dough in the cast-iron skillet.
-
Use a knife to cut an X on the top of the dough.
-
Sprinkle a tiny amount of flour on the dough.
-
Bake in the oven for 35-40 minutes or until done.
-
I check for doneness by tapping the bread when it is golden brown. If it sounds hollow, it's done. Let the bread rest on a cooling rack until slightly cool. Slice and enjoy.
Can I use a Cookie Sheet
Yes, you can use a cookie or a baking sheet. You can use parchment paper or grease the cookie sheet and bake at 400°F (204°C) for 35-40 minutes or until golden brown. If the bread sounds hollow on the bottom when tapped, it’s done. I like the texture using the skillet, and the crust turns out how I want it.
How Do I Store Soda Bread?
The best way to store it is in plastic bags for 3-4 days.
Can I make this without buttermilk?
It tastes better made with buttermilk. If you don’t have buttermilk, add one tablespoon of white vinegar or lemon juice to one cup of milk. Now you have buttermilk. The buttermilk and the soda help this quick bread rise as leavening agents.
What Can I Serve With It?
- Scrambled eggs
- Bacon and eggs
- Quiche
- Soup or stews
- Casseroles
- Spaghetti
- Tossed salads
- Spinach salads
What Toppings Can I Put On It?
- Butter
- Jam, jelly, or fruit preserves
- Maple Syrup
- Sliced cheese
- Sliced cooked sausage
- Sliced ham
- Use like biscuits with cream gravies
Where Did Soda Bread Originate?
I quote Wikipedia: “In Europe, soda bread began to appear in the mid-19th century when bicarbonate of soda first became available for use as a raising agent. Bread, griddle cakes, and scones with bicarbonate of soda, plus cream of tartar or tartaric acid, became popular in Austria, Britain, Ireland, and Poland.”
Can I Freeze It?
Yes, you can. Put the bread in a freezer bag and store it in your freezer for 2-3 months.
Final Word
I’m trying hard to teach the world to cook from scratch, and this soda bread is another way. If you make a pot full of soup, you’ll want to make this bread to stretch your budget.
I hear a few people saying they don’t eat carbs, and I get it. But so many families need to make their grocery budget go further and do so with a nutrient-rich recipe. May God bless this world, Linda







Thank you for trying to help calm people’s fear of not being able to feed themselves. There are so many grocery store dependent people it is scary. Scary event, panic buying, hoarding, supply chain problem, highjacking delivery vehicles, food shortages. Grocery store dependent people will not last over two months. People used to laugh snuggly about “those crazy preppers, now everyone is trying to figure out how to be one within a week. Learn then teach your children how to feed themselves! Give them the peace of mind to have food security.
H Michael, thank you for your kind words. This is a way of life for you and me, no panic, no fear, we are prepared. I wish this pandemic would wake a few people up to be prepared. My gut tells me, it will not. But I’m hoping people will learn they cannot depend on anyone else and they need to take care of themselves. It would be very hard for me to look at my loved ones and say, “I wish I had stocked more food”. Let’s pray they get it, this time! Stay well, Linda
I am grateful for your sharing of simple budget stretching recipes. You are an encyclopedia of useful tips for the challenges of this present time! I plan to print out your recipes and your advice, for there is no guarantee we will always have access to the internet. (At my age, I cannot trust my memory to recall all that you have shared.) Stay safe, Linda, keep on posting, and God bless.
HI Debbie, you are so nice, thank you for your kind words. I’m worried about the internet going down, too. Let’s hope everyone prints them out. Stay well and keep on baking! Linda
Good Morning, Linda. As you know, I eat low carb, however, right now, during this time, I am somewhat staying with my lifestyle, but at the same time, it’s been blown out the window. I’ve had a lot of food given to me that does not fit in my lifestyle, but for the most part it is still somewhat good food. Even though I was/am prepared, I’m doing just fine. I also know that I’ll get back on track when this gets under control. I’m grateful for what I had been putting aside for that “rainy day”. Between what little I have bought and what has been given to me, I’ve used very little of my stockpile. I’ve gone back to baking bread, but not the low carb bread which I have yet to find a good recipe and I’ve been trying for 3 years, lol. Good ole fashion homemade bread. I had forgotten how much fun it is to bake your own bread. To all your readers and yourself, of course. Please, everyone stay home, stay safe, and for goodness sake, don’t get around other people unless you absolutely have to. If you have kids at home, please, please do not take them grocery shopping with you. You could be putting an elderly person (like me) at risk.
Hi Pam, I’m glad to hear you are doing fine right now. Making bread relaxes me for some reason. There is something so awesome about having your hand in the bread dough, life is so good. I sure hope people are not taking their kids to the grocery stores. There are too many sick people who may not know they are sick or could give it to others. Stay well, Linda
Thank you Linda for this recipe. Our local stores here in the Prescott, AZ area have not had yeast for several weeks.
Hi Kathie, I have heard this, so I HAD to share my Soda bread recipe, glad you can use it!! Times are crazy but we need to feed our families, God bless you, Linda
I love all your recipes and tips, keep them coming. When you bake in a cast iron pan, do you need to heat it up first? Before you place the “dough” in or just when are ready to bake?
Hi Carol, this soda bread I did not preheat the cast iron pan. If I ever preheat a pan I will for sure put it in the recipe card. It’s so fun baking, let’s do it! Linda
Hi Linda, Thanks to you and your sensible advice I had a full pantry and freezer when the virus hit.
But, here in Oz buttermilk isn’t a pantry staple so I was wondering whether I could add a bit of melted butter to the milk and vinegar mix. Do you think that would give a better flavour or have any idea whether it could be a problem?
PS We’re close to a full lockdown here and both the internet and our phone lines are feeling the effect of increased traffic. Calls don’t connect and the internet either won’t load or falls over so I’ve been madly saving your items to the desktop computer or printing them off. I have a feeling I’m going to become very grateful for your articles in the months to come.
HI Carol, I have heard the internet is really flaky because of everyone on the block using the internet for homeschooling or whatever. Everyone is home, or those that can stay home are self-quarantined. I think it’s a good idea everyone print off the recipes because we will all be cooking with simple ingredients. Thank you for your kind words, I’m glad you are prepared with a freezer and pantry full of food. Stay well, my friend, Linda
Hi Carol, I forgot the buttermilk question: If you don’t have buttermilk, just add 1 tablespoon of white vinegar or lemon juice to one cup of milk. Now you have buttermilk. The buttermilk helps quick bread rise. Linda
Linda,
o.k. I read your recipe over and over,so you don’t have to knead this bread? I have made bread for
years but never made one that doesn’t need kneading. Wow that’s great but also takes away some
“exercise”. HAHA.
Hi June, oh you can knead it but it’s a super sticky dough. Sprinkle some flour on the countertop and make a round ball to put the dough in the skillet. I wouldn’t call it kneading but just mounding it? It’s so darn easy to make, my grandkids can make it. Linda
My granddaughter needed to make a “Quick Bread” for 4H to enter in the county fair this coming summer . I saw your recipe and thought it was perfect. We had a blast making it today and everyone raves about how wonderful it tasted and the perfect texture. My b-in-l couldn’t believe it was made w/o yeast. Thank you so much for this recipe.
HI Kathy, woohoo!! I’m so glad you made the soda bread! So many people cannot get yeast so I shared my recipe. I love your sweet comment! Linda
I plan on making this with the kids this week. I have been baking so many different types of bread since all of this began!
Hi Jess, I love hearing this! The more we can teach our kids about making bread, they can survive the worst of times. Good job! Linda
This is my new family favorite!!!!!!
Hi Alli, I love soda bread, I’m glad you tried making it! Linda
This looks great!! I love the fact that it doesn’t need yeast!! It looks so simple to make 🙂 Thank you for sharing!❤️
Hi Camille, I know, right? Yeast has been hard to get this last year! Enjoy, Linda
Perfect! Just what I needed for St Patrick’s Day. thank you!
Hi Tiffany, I know, right? St. Patrick’s Day is right around the corner!! Linda
Hi!
As always, you have wonderful ideas. This is such a great way to make bread without yeast. You are changing the world.
I buy powdered buttermilk. It works very well and keeps a long time on the shelf. I refrigerate it after I open it.
Keeping a pantry the way we (you and I ) do means being able to make most anything without a trip to the store. If we have ingredients, we have the ability to make everything!
I download your recipes into my paprika app. It’s on my tablet. Yes in grid down, I’ll have to charge it. I have the means to do that. No internet required.
I still have the cook book Mom gave me for college graduation and one of the original Joy of Cooking books a dear woman gave me many years ago. It has a recipe for WHALE! Big ick there. But, it’s all scratch cooking.
If you remember my telling you the story of my Mother and the cook book. – She said if you can read you can cook.
Prayers to you as always.
Hi CAddison, thank you for the 5 stars, my friend! Oh yes, I remember you mentioned your mom gave you a sewing machine and cookbook when you graduated! I remember that cookbook, “The Joy of Cooking”, what a great book!I forgot about powdered buttermilk, thanks for the reminder! I need to get a can or two. Thanks again for your kind words, Linda
Linda, This is a good recipe and the next time I make it I’ll do so in my Sun Oven–which is great for baking things in. The only drawback is that in order to maintain 400F I’ll have to re-aim it at the sun a couple of times. Beats heating up the kitchen during our long, hot summers though.
It’s what Jane calls a heavy bread and she doesn’t care for those–though my blueberry zucchini bread is heavy and she’ll eat that. Anyhow, your soda bread will go great with my corned beef and cabbage.
Hi Ray, thank you for the 5 stars, my friend! I love using my SunOven for bread of any kind and of course brownies! That’s the chocolate lover in me! I can never get mine up to 400F. The good thing is nothing burns! Linda
Hi Ray, I would bake it at 350 F to 375F if that’s the highest temp you can get. It may take longer but it should work! Linda
Ray: Please share your recipe for Zucchini Blueberry Bread! Thanks so much!
JESS
Jess, here’s my Blueberry Zucchini Bread recipe.
Ingredients
3 eggs, lightly beaten
1 cup vegetable oil
3 teaspoons vanilla extract
2 1/4 cups white sugar
2 cups shredded zucchini
3 cups all-purpose flour
1 teaspoon salt
1 teaspoon baking powder
1/4 teaspoon baking soda
1 tablespoon ground cinnamon
1 pint fresh blueberries
Directions
Preheat oven to 350 degrees F (175 degrees C). Lightly grease 4 mini-loaf pans, or two large loaf pans.
In a large bowl, beat together the eggs, oil, vanilla, and sugar. Fold in the zucchini. Beat in the flour, salt, baking powder, baking soda, and cinnamon. Gently fold in the blueberries. Transfer to the prepared mini-loaf pans.
Bake 50 minutes in the preheated oven, or until a knife inserted in the center of a loaf comes out clean. Cool 20 minutes in pans, then turn out onto wire racks to cool completely.
OR Bake in All American Sun Oven until a toothpick inserted in the middle comes out clean–that’s when it’s done, (takes 1 ½ to 2 hours).
Note: I typically use oversized zucchini (ones I overlooked while picking them from my garden). That means I normally only need one zucchini to get the two cups of shredded zucchini. I use a grater to shred the zucchini and I peel it first.
Then, very important, I dump the two cups into a clean tea towel or kitchen towel and wring as much water out of it as I can. Do not omit this step as you want it as dry as possible before adding it to the mix.
During growing season I grate, wring out, and vacuum seal 2-cup sized packets of zucchini so I can make this delicious bread year round using my own zucchini.
Hi Ray, I’m going to make this I have shredded zucchini in the freezer! Thank you!! Linda
Hi Jess, love this idea! Yay! Linda
Jess, I’ve also taken to using coconut oil instead of vegetable oil, but that’s optional.
Hi Ray good idea switching out the vegetable oil for the coconut oil. Linda