How To Bake Bread And Survive Any Disaster
I will show you how to bake bread and survive any disaster today. Yes, you can make bread with my no-fail recipe. I promise. A few years ago I wrote a post showing how you can make bread in three different ways. Well, since then I have learned to make bread in a Dutch oven so now I can show you how to make bread four ways. Now, not everyone has a wheat grinder so today it’s all about making white bread. After a disaster, white bread will fill the belly and you can serve it with soup. I hope people in your community are teaching each other how to make bread with or without a bread-mixing machine. If it’s a freshly ground whole wheat bread class, you rock. I grew up making bread so it’s just a way of life for me and saves me lots of $$$ on my food budget.
I have taught several classes on how to make bread, in my home, in specialty kitchen stores, and in large groups in church kitchens. If you have fresh ingredients, you can make bread. I have a no-fail recipe anyone can succeed at making bread. When I say fresh ingredients, here’s the deal on this statement. I only buy this yeast: Saf Instant Yeast, 1-Pound Pouches (Pack of 4) if you don’t bake a lot just buy one: Saf Instant Yeast, 1 Pound Pouch
.
Using Fresh Yeast Is Very Important
I store ONLY the amount of SAF Yeast in my refrigerator that I will use in a month. The open pouch that won’t fit in my refrigerator jars goes in an air-tight container in a quart mason jar in the freezer. The other unopened SAF yeast pouches go directly into my freezer. I always buy 4-6 pouches at a time. I cannot ever run out of yeast. Yes, I could make unleavened bread but I don’t want to for my weekly bread making. I shouldn’t say weekly, it’s actually about every two weeks because I only make eight loaves and freeze seven.
This reminds me, these are the bags I use to freeze my bread: 100 Count Clear Bread Bags / Includes 100 Cable TiesThese are fairly cheap and include the ties. I never reuse the bags, but I do use these bags for other things besides bread. It’s just the shape of the bags that I need to store and freeze my bread.
I also only recommend bread flour, I grew up using all-purpose white flour but it’s not the same, trust me on this one. I try always to buy unbleached bread flour, just giving you the heads up here. The flour must be less than 12 months old because it has bread spores leaching in the bucket after a year. I store my flour in 5-gallon buckets with Gamma lids. Gamma lids make the container air-tight and are easier to open and close the buckets: Gamma Seal Lid – Red – For 3.5 to 7 Gallon Buckets or Pails Gamma2
Bake Bread and Survive:
First of all, here is my recipe for two loaves of bread: White-Bread-For-Two Recipe or Whole-Wheat-Bread-For-Two Recipe I have to laugh every time I share my two-loaf recipe. When I was asked to write my book “Prepare Your Family For Survival” my publisher said I had to cut my recipe down to two loaves. The editors mentioned no one makes more than one loaf at a time where we live. Well, in Utah most people make 4-8 loaves at a time, right? So, yes, I cut my recipe down and actually, it’s been a favorite download for college students, two-member families, etc.
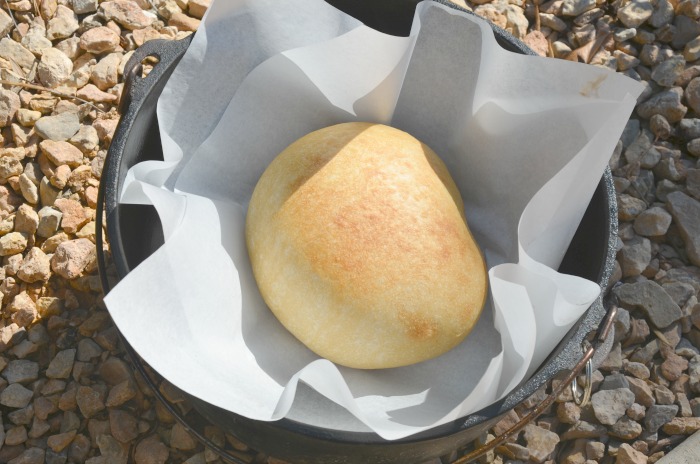
Lodge Dutch oven:
If you have a 6-quart Dutch oven you can make bread perfectly by only using charcoal briquettes and a match. I just the rocks out in my front yard to start the small fire away from trees and of course, my house. Here’s a picture of the first loaf I made:
Here is my PRINTABLE Dutch oven chart: Dutch Oven Chart I called Lodge Manufacturing to see if I could make my own printable chart using their numbers and they gave me permission to do so. I love their products.
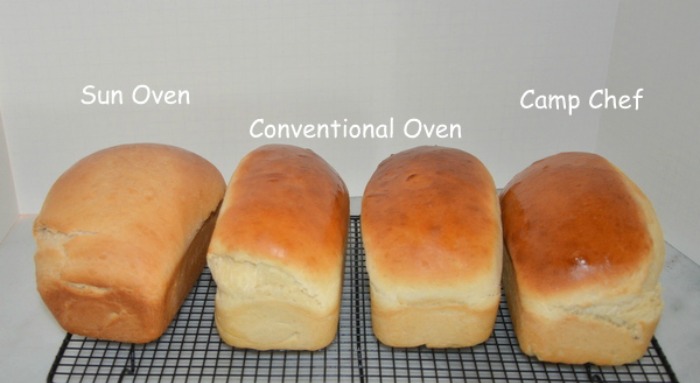
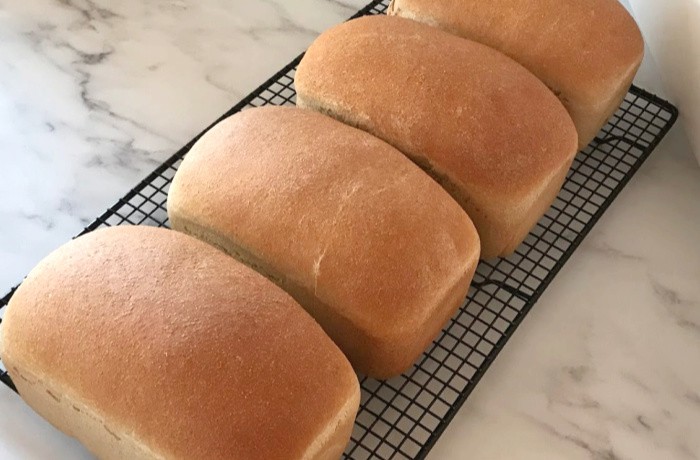
Here’s the picture of the first three loaves of bread using three different ovens a few years ago:
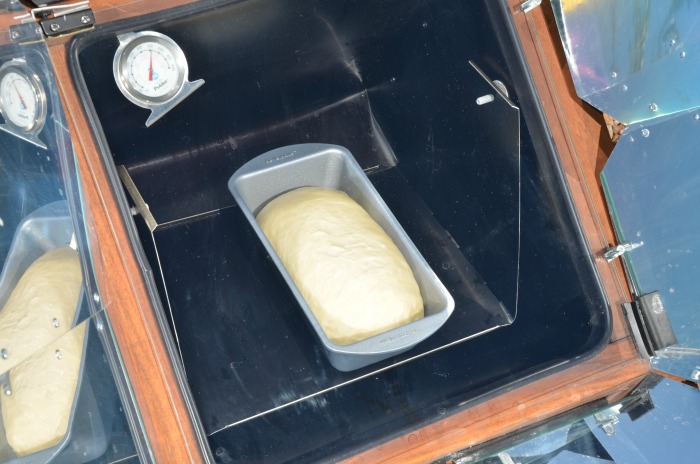
Sun Oven:
The one loaf on the left was baked in a Sun Oven using a non-reflective or non-shiny pan. If you use a stainless steel pan the sun will reflect the heat away from the items you are cooking. All American Sun Oven- The Ultimate Solar Appliance
Conventional Oven:
The two middle loaves were baked in my home in my own conventional oven.
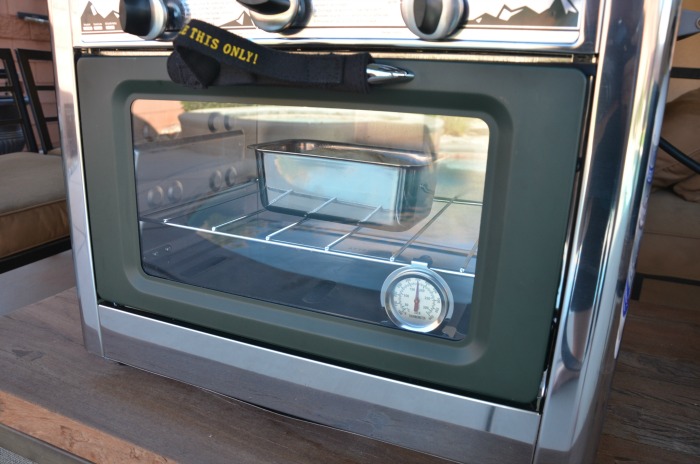
Camp Chef Stove/Oven Combination:
The loaf of bread on the far right was baked in my Camp Chef: Camp Chef Camping Outdoor Oven with 2 Burner Camping Stove This stove uses propane in the small cans or the large propane tanks. Make sure you have the adaptors for your tanks before you need them.
Thanks for being prepared for the unexpected. May God bless you for your efforts. A comment below from Gayle reminded me of the fact that I do not recommend these Sun Ovens in any area that has very little sunshine each year.
Readers’ comments:
Gayle: I’m glad you have different pics of how to bake it. We live in the rainy pacific northwest and sun oven is just not practical in a rainforest.
Lauralee:
Cheddar Biscuits:
2 cups all-purpose flour
4 teaspoons of baking powder
1 tablespoon of sugar
1/4 teaspoon baking soda
1/2 teaspoon of salt (omit if you want)
1/2 cup shortening (I used Crisco butter flavor)
3/4 cup of buttermilk
3/4 cup shredded cheddar cheese (the sharper the cheddar the more you’ll taste it in the biscuits).
Preheat oven to 450 degrees F, Mix together the dry ingredients, Cut in the shortening until you have coarse crumbles, then add milk all at once. Stir together until dough clings together. Now knead in the shredded cheese. Roll or pat to 1/2 inch thickness on a floured board or parchment paper (I use parchment paper and use that paper again to put on my baking sheet for the biscuits). Use a biscuit cutter or glass (I use a glass I don’t own a biscuit cutter) and cut out 8-12 biscuits (it will depend on the diameter of the glass). Place parchment paper on a baking sheet (do not grease), then place biscuits on the cookie sheet. Cook in the 450-degree F oven for 10 to 12 minutes (I think I made my biscuits a bit thicker because it took almost 14 minutes for them to get cooked through), until they are golden brown and cooked through. My husband said I should have added some cooked crumbled bacon in them, but I didn’t have any and he ate them just fine.
PRINTABLE recipe by Lauralee: Cheddar Cheese Biscuits from Old Family Recipes




Not only is baking bread a life saver, it just tastes better,and it doesn’t have lots of ingredients that I can’t pronounce. Toasted Cheese sandwiches with homemade bread are delicious. (and cheap)
Janet, oh the grilled cheese on homemade bread is the best! Hugs! Linda
I’m glad you have different pics of how to bake it. We live in the rainy pacific northwest and sun oven is just not practical in a rain forest.
Blessings,
Gayle
Hi Gayle, thanks for reminding me of the rainy dark areas in different areas around the world and the US. I wrote this at 4:00 a.m. this morning. I always mention that to my readers because they will not work where you do not have enough sunshine. They really are not practical in several states. I’m going to go add your comment to my post. Thanks again, Linda
Love homemade bread. Didn’t make homemade bread today to eat with our homemade stew, but I did make cheddar cheese buttermilk biscuits and they are cooking in the oven right now. Even though it’s not quite time for evening meal the hubby and I are a bit hungry smelling the stew cooking, so making the biscuits early so we can each have one before our regular meal time.
Hi Lauralee, I want to make some cheddar cheese buttermilk biscuits, right now! Those sound yummy! I hope all is well with you! Hugs! Linda
2 cups all purpose flour 4 teaspoons of baking powder 1 tablespoon of sugar 1/4 teaspoon baking soda 1/2 teaspoon of salt (omit if you want) 1/2 cup shortening (I used Crisco butter flavor) 3/4 cup of buttermilk 3/4 cup shredded cheddar cheese (the sharper the cheddar the more you’ll taste it in the biscuits).
Preheat oven to 450 degrees F, Mix together the dry ingredients, Cut in the shortening until you have coarse crumbles, then add milk all at once. Stir together until dough clings together. Now knead in the shredded cheese. Roll or pat to 1/2 inch thickness on a floured board or parchment paper (I use parchment paper and use that paper again to put on my baking sheet for the biscuits). Use a biscuit cutter or glass (I use a glass I don’t own a biscuit cutter) and cut out 8-12 biscuits (depends of the diameter of the glass). Place parchment paper on baking sheet (do not grease), then place biscuits on sheet. Cook in the 450 degree F oven for 10 to 12 minutes (I think I made my biscuits a bit thicker because it took almost 14 minutes for them to get cooked through), until they are golden brown and cooked through. My husband said I should have added some cooked crumbled bacon in them, but I didn’t have any and he ate them just fine.
Oh my gosh, these look amazing! Can I share it my post with your name? Yummy! Linda
Yes you can share it and you don’t have to put my name, I don’t have it copyrighted or anything. LOL. I’m sure other people have made similar biscuits, probably got the recipe from their grandmothers at some point in their lives as well.