The Best Homemade Cinnamon Rolls
I love soft and moist cinnamon rolls with homemade cream cheese frosting this time of year. If you take the time to make them, these will be the best homemade cinnamon rolls you’ve ever eaten! Making things from scratch is one thing families should know how to do. If there’s a disaster scenario in your area, you’ll still crave something sweet you can make and enjoy at home until things return to “normal.”
Easter, Thanksgiving,, and Christmas are holidays when we make and enjoy some of our favorite recipes, especially desserts. There is nothing quite like the smell of a meal cooking in the oven, and these rolls are a great addition to any meal.
Below, you’ll learn to make the best homemade cinnamon rolls in your oven and use a proofer, if desired! I recommend knowing how to proof the dough both ways. Please remember that I don’t use a proof machine, though others swear by them.
If you keep your home furnace heat at 65°F or 18°C, the room may be too cool for the rolls to rise. I also make sure no storms are coming. It may be an old wives tale, but I never have homemade dinner rolls, bread recipes, or my cinnamon rolls fail. I keep my kitchen temperature at around 72°F or 22°C. I prefer a sunny day. Plus, the pictures of the finished product turned out better for me since I’m not a professional photographer. Gotta love it!
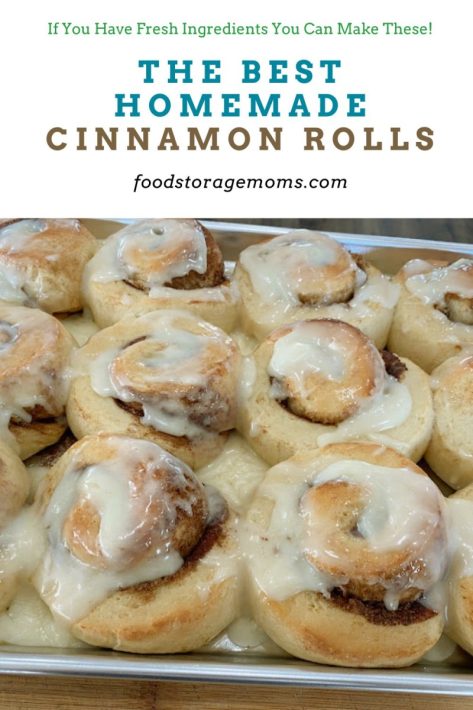
Homemade Cinnamon Rolls
What makes these the best cinnamon rolls? First of all, everything tastes better when it’s made from scratch, but these homemade cinnamon rolls come with high standards. We like our cinnamon rolls, which are soft, fluffy, gooey, and moist, and that’s precisely what you get when you use this recipe.
These rolls puff up tall but are soft all the way through. With homemade cream cheese frosting, they’re also gooey and delicious—they melt in your mouth with every bite!
Cinnamon Roll Ingredients
You will need a few baking ingredients to make these deliciously moist cinnamon rolls. Here’s what you need:
- Yeast-I use SAF Instant Yeast, but you can use any instant yeast that you prefer. Over the years, I’ve found that having fresh yeast is critical to a successful result. Actually, that goes for all the ingredients. My yeast is stored either in the fridge or freezer as an extra precaution.
- White Bread Flour– You can use all-purpose flour, but I find the rolls come out fluffier with white bread flour. And my bread flour has more protein than other flour varieties, which I appreciate when making any of my bread rolls.
- Milk- Warm your milk up as it helps to dissolve the yeast, sugar, and butter, making your cinnamon rolls fluffy and delicious. Warm milk, just like liquid warm water called for in many recipes, is an easy step to help make the ingredients work well together.
- Oil- I use olive oil or vegetable oil.
- Sugar– You’ll need both white granulated sugar and brown sugar for this recipe. Scoop the sugar using your measuring cup, pack it down, and level it off.
- Cinnamon– You can’t have cinnamon rolls without cinnamon! My family likes some extra cinnamon, so I add a little more.
- Butter– Soften the butter at room temperature. Take it out of the fridge a couple of hours before you begin the recipe for the best results. You will need ¼ cup of butter.
- Eggs– Yeast likes a warm environment, so it’s best to use room-temperature eggs, along with your room-temperature butter for optimal yeast activity.
- Dough enhancer– This makes your dough rise better, stay softer, and last longer! Make sure to stock dough enhancers for better recipes! I typically use a dough enhancer when I make my soft dinner rolls, bread, cinnamon rolls, etc.
- Salt– You will need sea salt for this recipe, not regular salt.
For the Glaze
You’ll also need additional ingredients to make your homemade cream cheese frosting to glaze the cinnamon rolls. Here’s what you need:
- Butter– Again, the butter needs to be softened, so if you take it from the fridge or freezer, you’ll want to let it thaw first. You’ll need to soften ½ cup of butter for the glaze.
- Cream cheese– Let the cream cheese sit out with the butter to soften before you start making the recipe.
- Powdered sugar– Powdered sugar melts easier in frosting and glaze. Don’t use regular sugar for the glaze!
- Vanilla– For a delicious flavor, you’ll need a little bit of vanilla extract.
How to Make Homemade Cinnamon Rolls With Cream Cheese Frosting
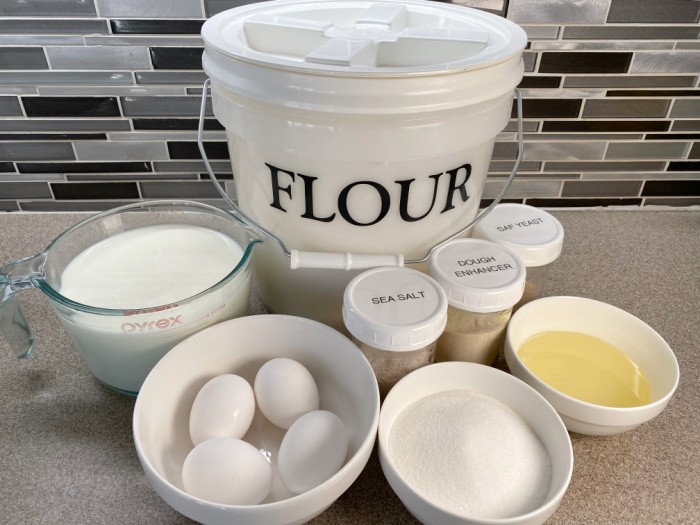
Nothing is better than the aromas that fill your home when you make fresh cinnamon rolls! Gather all your ingredients and let’s start baking!
Step 1: Gather & Mix Your Ingredients
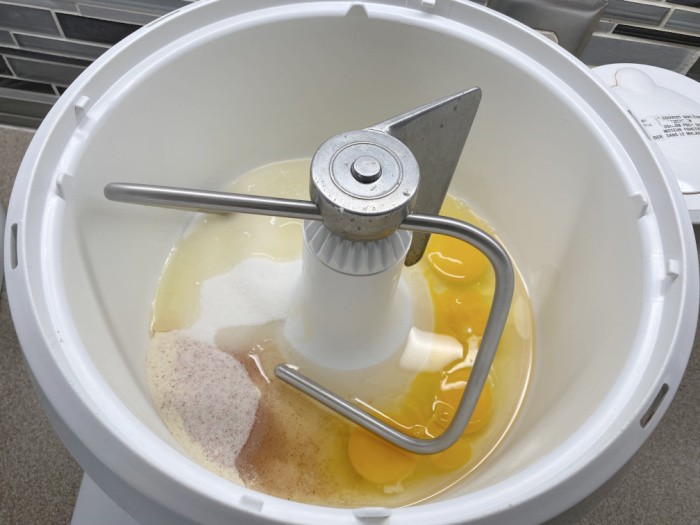
First, in a large mixing bowl, whisk together the yeast, warm milk, olive oil, sugar, sea salt, dough enhancer, butter, and eggs. Note that the large bowl I use is the one with my Bosch mixer. I like the Bosch unit since it has the extra power I need for many of my bread recipes, and I like how the dough hook works with my bread. That way I don’t need to worry about the size of the batch, it just does its thing!
If you have a powerful enough stand mixer, you can use the bowl of a stand mixer just as well.
Step 2: Gradually Add the Flour
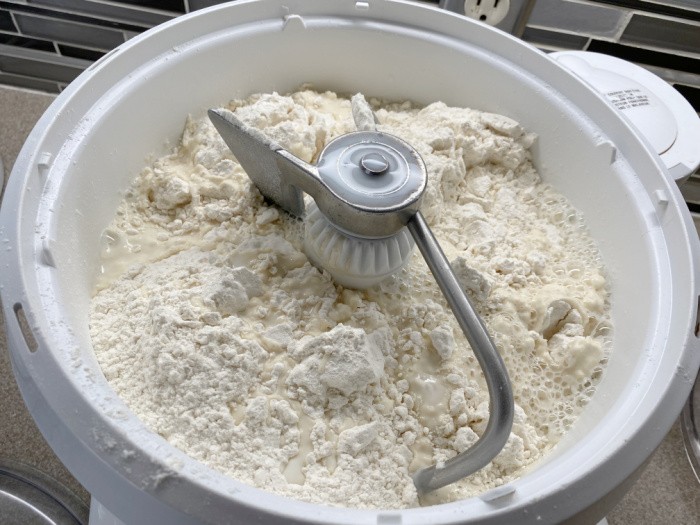
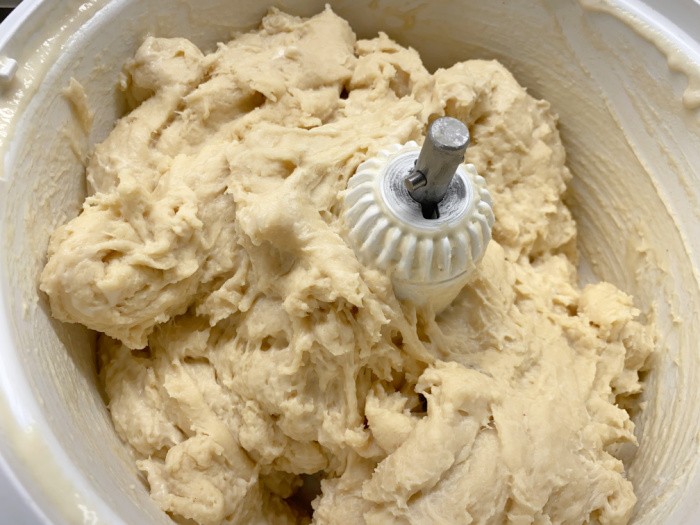
Next, add half the flour. Then, keep adding the flour gradually until the dough pulls away from the sides of the bowl. The Bosch does the kneading for you.
Step 3: Proof the Dough (let it rise)
Cover your mixing bowl with plastic wrap and place the bowl with the dough on the countertop. You want to let it rise for about an hour.
Step 4: Roll the Dough
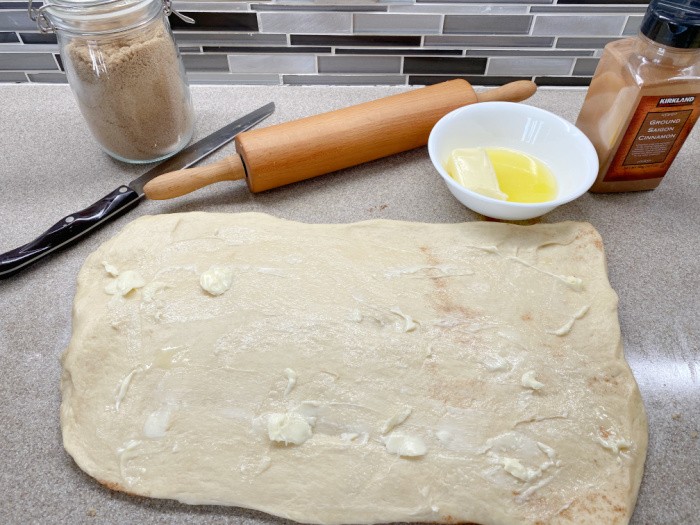
After an hour, punch the dough down, place the dough on a lightly floured surface in your kitchen, and then roll it into two 12” by 18” rectangles. You’ll roll out TWO of these. I only have ONE pictured below.
Step 5: Add Cinnamon and Brown Sugar
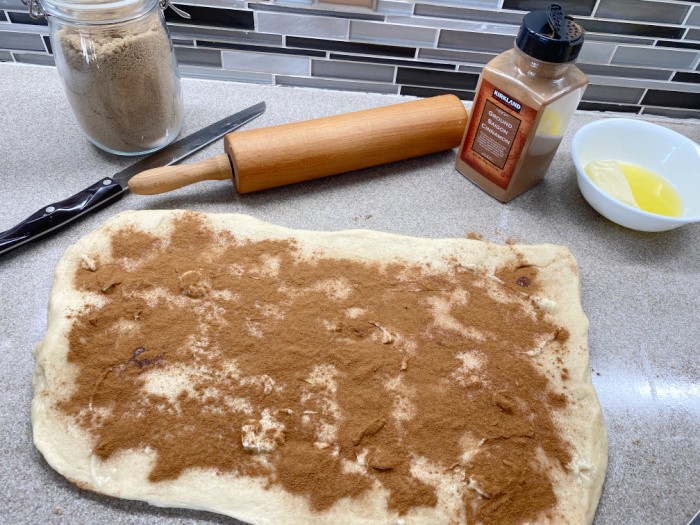
Lather the dough with softened butter, you suggest using a kitchen brush to make sure it goes on evenly. Then, sprinkle your desired amount of cinnamon on the dough ( I use ALOT). Then sprinkle with 1/2 cup of brown sugar on EACH rectangle.
Step 5: Brown Sugar
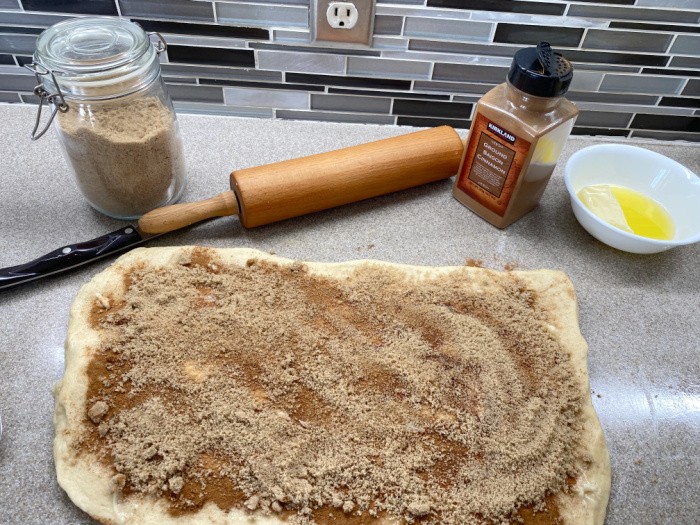
You can see below how I’ve scattered the brown sugar on top of the cinnamon. Using something like kitchen tablespoons to apply and spread the cinnamon works great.
Step 6: Proof the Dough Again (let it rise again)
Roll the dough tightly into a tube. Then, cut it into 1-1/2-inch rolls.
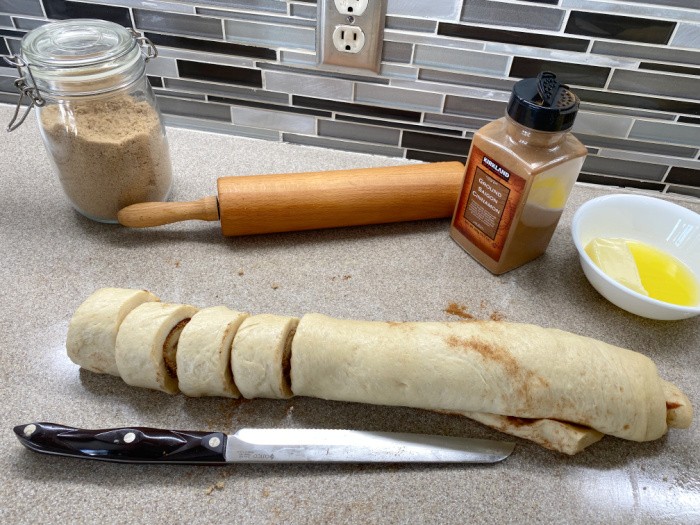
Step 7: Put the Rolls on a Cookie Sheet
Place the cut rolls on a greased cookie sheet and cover them with greased plastic wrap. I’ve found that cookie sheets work better for me than a baking dish since I can put more rolls on the sheet.
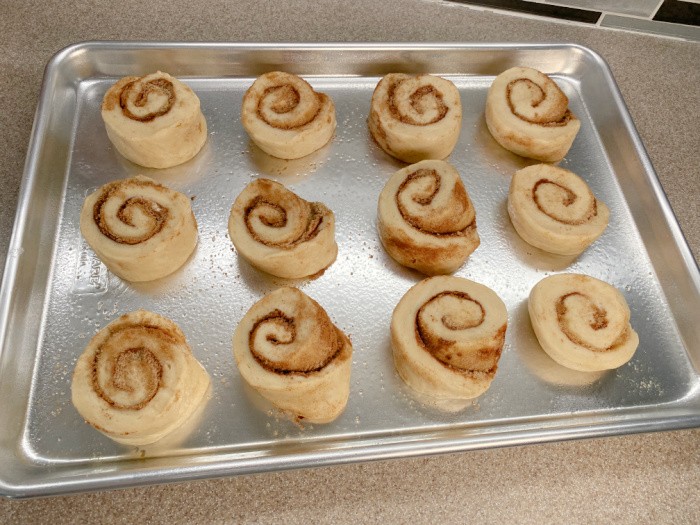
Step 8: Let Them Rise
Let the rolls rise one more time for about an hour, or until the cinnamon rolls double in size.
Step 9: Bake the Cinnamon Rolls
Finally, preheat your oven to 350°F or 176°C. Then, bake your cinnamon rolls on the greased cookie sheet for 15-20 minutes, or until golden brown. Make sure you take off the greased plastic wrap first.
Step 10: Make the Cream Cheese Frosting
While your cinnamon rolls are baking, make the cream cheese frosting. Cream the butter and cream cheese together. Then, slowly add the powdered sugar to your desired thickness. Add the vanilla and blend until well incorporated. Frost your cinnamon rolls while they are still warm so that the frosting melts on top.
Final Product
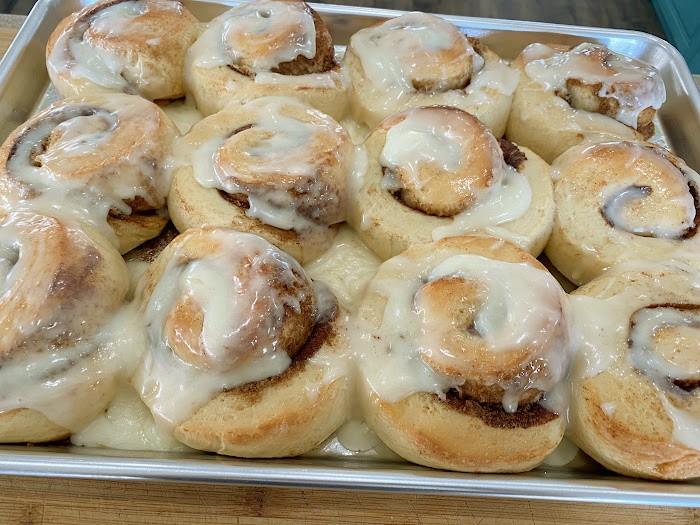
Recipe Tips
- Don’t overheat the milk. Warm your milk to about 110°F or 43°C. Anything over that will kill the yeast, and anything lower can increase the time it takes the dough to rise. Dip your finger in the milk, it should be warm, but not hot.
- Use soft butter. The secret to super tender cinnamon rolls is the butter! You want very soft butter, but not melted butter. Take it out and set it on the counter a few hours before you start the recipe.
- Do Not scoop the flour with the measuring cup! Flour packs tightly so if you use your measuring cup to scoop it, you will use too much flour and your rolls will be dry. Instead, use a spoon to scoop the flour into the measuring cup, and then scrape the excess off with a butter knife.
- Use room-temperature butter for the rectangles. When lathering with butter before adding the cinnamon and sugar, it’s best to use room-temperature butter rather than melted butter. This prevents the cinnamon and brown sugar from seeping out of the sides. Use the back of a spoon to spread the soft butter on the dough gently.
- Don’t overbake the rolls. Your cinnamon rolls should be golden brown. If you overbake them, they won’t be as soft and moist as you’d like them. Check them after 15-minutes of baking to get a feel for how much longer they’ll take.
How to Make Cinnamon Rolls in a Proofer
If you have a proofer, you can use it to make cinnamon rolls as well! First, follow the steps above to make your dough. Then, you can use a proofer to proof the dough for even better cinnamon rolls! If you aren’t sure how to use one, check out my proofer post: How to Make The Very Best Cinnamon Rolls. Just so you know, I don’t use a proofer.
Why Doesn’t My Dough Rise?
If your dough doesn’t rise to double the size the second time that you “proof” it, it’s probably because the yeast was not fresh enough. As I have stated in the past, you want to store your yeast, dough enhancer, and wheat gluten in the refrigerator or freezer to keep it fresh longer. Proof your yeast before adding it to the dough to be sure it is good. I do not do this, I know my yeast is good.
Why Are My Cinnamon Rolls Hard?
Most of the time, the reason a cinnamon roll is hard is that you added too much flour. As stated in the recipe tips, you have to measure the flour correctly or you will end up using too much. This results in rolls that are hard and dough that is dried out. Be sure to measure your flour precisely.
You also may have cooked the rolls too long. Monitor them while cooking so they get to that golden brown color you want.
How Do I Know My Cinnamon Rolls are Done?
The best way to tell if your cinnamon rolls are done is to do the toothpick test. Stick a toothpick or a knife into the center of a cinnamon roll. If it comes out clean, it’s done. If you see raw-looking dough sticking to it, it needs to cook a bit longer. Begin checking your rolls after 15-minutes of baking.
- 4 Teaspoons SAF Instant Yeast
- 1/2 Cup Water
- 2 Cups Warm Milk
- 1/4 Cup Olive Oil
- 1 Cup Sugar
- 1-1/2 Teaspoons Sea Salt
- 4 Teaspoons Dough Enhancer
- 2 Eggs
- 6-7 Cups White Bread Flour
- 1/2 Cup Softened Butter (1/4 cup for each rectangle of dough)
- Cinnamon-cover the dough with the desired amount of cinnamon. I use a lot of cinnamon!
- 1 Cup Brown sugar (1/2 cup for each rectangle of dough)
-
First, in a large mixing bowl, whisk together the yeast, warm milk, olive oil, sugar, sea salt, dough enhancer, butter, and eggs.
-
Next, add half the flour. Then, keep adding the flour gradually until the dough pulls away from the sides of the mixing bowl.
-
Cover your mixing bowl with plastic wrap and place the bowl with the dough on the countertop. You want to let it rise for about an hour.
-
After an hour, remove the dough from the bowl. Punch the dough down and roll it into two 12” by 18” rectangles.
-
Lather each 12" by 18" rectangle dough with softened butter. Each rectangle will need about 1/4 cup. Add your desired amount of cinnamon on top of the dough. Then, sprinkle 1/4 cup brown sugar on EACH 12" by 18" rectangle of dough.
-
Roll the dough tightly into a tube. Then, cut it into 1-1/2-inch rolls. Tuck the "tail" under the cinnamon roll. Place the rolls on a greased cookie sheet and cover them with greased plastic wrap and let them rise one more time for about an hour or until the dough doubles in size.
-
Finally, preheat your oven to (350°F) = (176°C). Then, bake your cinnamon rolls on a greased cookie sheet for 15-20 minutes, or until golden brown.
-
Frost your cinnamon rolls while they are still warm so that the frosting melts on top of them.
Don’t overheat the milk. Warm your milk to about (110°F) = (43°C)
Anything over that will kill the yeast, and anything lower can increase the time it takes the dough to rise. Dip your finger in the milk, it should be warm, but not hot.
-
- Use soft butter. The secret to super tender cinnamon rolls is the butter! You want very soft butter, but not melted butter. Take it out and set it on the counter a few hours before you start the recipe.
- Do Not scoop the flour with the measuring cup! Flour packs tightly so if you use your measuring cup to scoop it, you will use too much flour and your rolls will be dry. Instead, use a spoon to scoop the flour into the measuring cup, and then scrape the excess off with a butter knife.
- Use room temperature butter for the rectangles. When lathering with butter before adding the cinnamon, it’s best to use room temperature butter rather than melted butter. This prevents the cinnamon and brown sugar from seeping out of the sides. Use the back of a spoon to gently spread the soft butter on the dough.
- Don’t overbake the rolls. Your cinnamon rolls should be a golden brown. If you overbake them, they will not be as soft and moist as you would like them. Check them after 15-minutes of baking.
Cream Cheese Frosting

- 1/2 cup butter, softened
- 1- 8- ounce package softened cream cheese
- 3-3-1/2 cups powdered sugar
- 1 teaspoon vanilla
-
Cream the butter with the cream cheese. Slowly add the powdered sugar to the thickness you desire. Add the vanilla and mix until everything is incorporated.
- You can make this recipe and freeze it in smaller containers to use at a different time.
More Homemade Recipes You’ll Enjoy This Time of Year:
- White Chocolate Chex Mix
- Eggnog Pancakes with Eggnog Syrup
- Cranberry Banana Coffee Cake
- Instant Pot Cheesecake
Final Word
Knowing how to make things from scratch is essential for a family. You have to know how to use what you stock! I love the best homemade cinnamon rolls written about today, so if we can’t get to the grocery store to buy the pre-made cans which really won’t taste as good, then we have to know how to make them from scratch!
Plus, I think homemade cinnamon rolls are so much better, anyway! What do you think? May God Bless this world, Linda





Oh my God. I swear I started drooling just reading this recipe. Jane makes a delicious cinnamon bread so I printed this recipe out for her to try. We both love cinnamon rolls.
Hi Ray, oh my gosh, I LOVE your comments, my sweet friend!! You always make my day! Now, I need to make some cinnamon bread, great minds think alike! Thank you for the 5 stars!!! Hugs from Utah, Linda
OMG! I’m with Ray on this. I have to save this one. I love Cinnamon Rolls. Since I have pecans that need to be used, I may have to put chopped pecans in mine. Thank you so much for sharing this recipe.
I made Pecan Pie bars yesterday. Oh my, they are so good. Even if I did make them.
Hi Deborah, thank you for the 5 stars, my sweet friend! Oh, pecans would be awesome in these! Now I want to make Pecan Pie bars!!! Hugs from Utah, Linda
Linda, I’m so bad that I ate one for breakfast. LOL They are that good.
I did use light corn syrup instead of dark, but hey it’s what I had.
Hi Deborah, oh that could easily be my new breakfast food! Bring on the Pecan Pie Bars!! LOL! Linda
Oh my goodness !!!! These look so good! I’m going to make these for Christmas
Hi Alli, thank you for the 5 stars, my friend! You will love making these! Linda
These look amazing! I make cinnamon rolls every year Christmas morning. I’m definitely making these this year! Thank you sooo much for sharing!
Hi Camille, thank you for the 5 stars, my friend! You will love this recipe! Linda
I love these so much!! They are so easy and the family enjoys them!! Thanks for the recipe! ❤️
Hi Stacie, thank you for the 5 stars, my friend! I’m glad you love the recipe! Linda
Amazing! These are a family favorite now!
Hi Heidi, thank you for the 5 stars, my friend! I love hearing this recipe is your family’s favorite! Linda
Your Cinnamon rolls look good. I have a recipe that I have used for years I got from my mom and they are the kind
that you let the dough rise in the fridge overnight. I love these and make all the time. Someone said they make
cinnamon rolls for Christmas I make Stollen for Christmas morning. It is almost like cinnamon rolls but you use candied fruit in it. So good.
Hope everyone has a MERRY Christmas
Hi June, oh my gosh, I love Stollen and have never made it. Is your recipe easy? I love cinnamon rolls, I bet the refrigerator recipe is awesome! Merry Christmas! Linda
Is there a rating for more than 5 stars? I would give it 100. Just as I think you can’t surprise me with another recipe you do. Thank you dear friend
Hi Jackie, thank you for the 5 stars my sweet, friend! I had to share this one before the holidays!! Linda
I made apple jelly yesterday that didn’t set up, so I used 1/2 c of it instead of the water in this recipe. I also took some and thickened it with cornstarch and melted butter into it. That is what I spread in the middle with the cinnamon. It was super messy when rolling, but the house smelled so amazing and these are so soft and delicious! My family thanks you immensely! I’ll work on fixing the jelly later. I’m too busy devouring too many rolls right now!
Hi Kirsten, thank you for 5 stars, my sweet friend!! Now I want to make cinnamon rolls using apple jelly!! They sound amazing!!! Oh my gosh, I want to make these ASAP! Linda
Christmas morning cinnamon rolls are tradition at our house. There are 2 tricks that I learned from watching how Cinnabon does their rolls.
1. Pinch your seam. After you’ve rolled up your dough, (before you cut them) take a moment and pinch the dough along that seam. It makes them less likely to unroll.
2. Cut your dough with waxed dental floss. Cutting with a knife can flatten the beautiful roll you have just created. Use about 24” of dental floss and place the middle of it under the rolled up dough with the ends of the floss sticking out on doth sides of the dough. Bring the floss up and cross it over the top of your dough. Pull the ends evenly and let the X created in the floss cut down through the dough. Move the floss under your roll to your desired width and continue cutting each individual roll. You’ll find that this simple method will cleanly cut through the dough without any compression.
Hi Della, thank you for the 5 stars, my sweet friend! You know I have heard about waxed dental floss for years, thank you for the reminder. I will try it again, love this! Linda
This is one of my favorite recipes of yours!! They are so delicious! My kids beg me to make these all the time. They are so easy to make too!
These are a family favorite! The frosting is perfect for them too! These don’t last long at our house ❤️