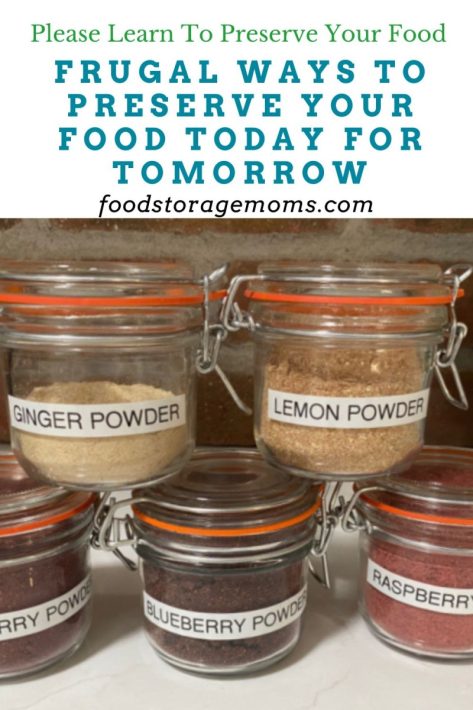
Frugal Ways To Preserve Your Food Today For Tomorrow

If you’re like me, you’re looking for a frugal way to preserve your food. I’m talking about those bananas sitting on your kitchen counter, and they are starting to get those tiny brown spots. I can’t always make banana bread, so I slice a few of those bananas and dehydrate them for snacks. The Best Banana Bread
Once dehydrated I place them in a wide-mouth quart-size mason jar with a lid, either by using my FoodSaver to remove the air or just using these Ball jar lids: Leak Proof Lids. I prefer using the wide-mouth mason quart jars because they are broad enough so my hand fits nicely in the jar to grab a healthy snack like dehydrated bananas.
Mark and I spent many a summer and fall weekend using our water bath canner to preserve our own food from the garden and fruits and veggies from local farmers. Home food preservation has been important to us and we taught our daughters from a young age to plant and grow a garden. It was fun to watch them gather the green beans and fresh strawberries they’d enjoyed growing and then harvesting. Water bath canning is all I knew of the various food preservation methods for several years. Then we branched out and tried other options.
What is food dehydration?
Food dehydration is the process of removing moisture from foods such as fruits, vegetables, and meat to preserve them for extended periods. Having a dehydrator is a very cost-effective way to preserve food and I’ve had my Excalibur for a very long time. It is efficient and flexible as I use various tray configurations, depending on the food being dehydrated.
How to Preserve Your Food
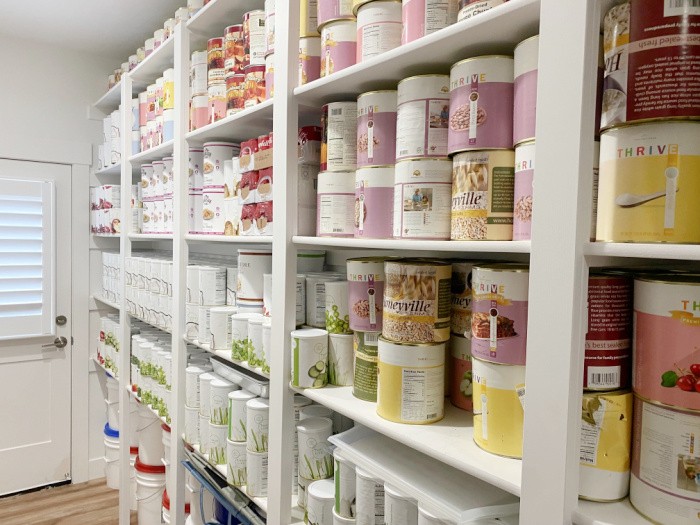
I want to show you how easy it is to dehydrate food. Again, this is for shorter-term food storage only. If I want food storage with a longer shelf life, I buy commercially processed #10 cans by the case or one #10 can at a time. I also buy food when my local stores have case lot sales for short-term food storage. Thrive Life also has pantry-size cans that are a great size.
You’ll need to verify the temperatures for your dehydrator. I bet they are very similar, but check your book to be sure. The time to dehydrate any food items will depend on the humidity of the room where you are dehydrating along with the temperature setting. No worries about dehydrating fruit and vegetables, it’s really easy to do, I promise. Effective Ways To Prepare For Food Shortages
Tips for Learning to Preserve Your Food
When I talk about long-term food storage, I’m talking about a shelf life of 25 years. I prefer freeze-dried food over dehydrated because it lasts longer. Therefore, I have little or no food loss and the related expenses when buying long-term food storage that I can rotate. Today, this post concerns dehydrating the surplus in our freezer, refrigerator, or bumper crop we harvest from our gardens. How to Properly Reuse Ziploc™ Bags
Use Your FoodSaver
I sometimes use my FoodSaver to remove the air from my jars, but not if I have made vegetable or fruit powders from my dehydrated food. For instance, you can dehydrate those 12 tomatoes you have left after you’ve used your pressure canner to preserve that massive batch of tomatoes. I can only eat so many bacon, lettuce, and tomato sandwiches, so I preserve the excess. I can hardly wait until my tomatoes are ripe. It’s funny because I can see six tiny green tomatoes outside in my garden right now. Oh man, does that get you excited too?
If you dehydrate, say, for instance, tomatoes, you can pulverize them in a food processor or your blender. Then, you can use this powder in scrambled eggs, quiche, soups, or spaghetti sauce. Here’s the deal, though: don’t use your FoodSaver with your powders. The powder will get sucked up in the tubing and damage the parts that seal your jars.
I went to class once, and they showed me how to use a baggie on top of the powders when using your FoodSaver. I can’t afford to replace my FoodSaver, so I will never use it when making vegetable or fruit powders. However, I use it all the time when storing several jars of dehydrated fruits and vegetables. Tips for Storing Fruits and Vegetables
Snacks or Powders
Now, you can make snacks or powders with fruits and vegetables. It does take a considerable amount of dehydrated vegetables or fruits to pulverize into a powder to fill a quart jar, just you know. Dehydrated pineapple is my favorite, I’m just giving you the heads up.
I like buying fresh pineapple at Costco, which is already sliced into spears. If I won’t be able to eat that pineapple sitting in the refrigerator before it goes bad, dehydrate it. You can do this year-round with most fruits and vegetables to preserve them for a later date. How To Dehydrate Bananas for Healthy Snacks
Here are a few ways to dehydrate and preserve food:
Dehydrate in your oven: I have heard people do this, but my electricity costs are so expensive where I live that it would cost me way too much money to dehydrate food that way.
Dehydrate on homemade screens outside: If you have extra window screens, cover your food outside with netting (I live where we have critters) and let the food dry naturally. I would bring the food in at night and take it outside the following morning to continue drying it.
Dehydrate some food on trays in your car: I have seen awesome pictures of people drying food on their vehicles’ dashboards to preserve their food.
I’m only talking about fruits and vegetables today, but meat jerky is a different story. You must have a good dehydrator to maintain the temperature correctly for meat. Plus, you must refrigerate or freeze it to be safe after dehydrating it.
As I mentioned, I use an Excalibur dehydrator similar to this: Excalibur 3926TB Food Dehydrator, Black. It’s quiet, and I set it right on my kitchen counter, unless I’m drying onions, in which case it goes outside. It has a timer, and that’s great for me. I can turn it off by hand when I want to or set the timer to turn off on its own if I leave the house or go to bed for the night.
I have friends who use Nescos and love them, like this one: Nesco Snackmaster Pro Food Dehydrator FD-75A.![]()
I love my FoodSaver, which is similar to this one: the FoodSaver Automatic Vacuum Sealer.
Dehydrating Fruit Tips
- FRUITS: (cut away any bruising or bad spots) I use an Excalibur dehydrator, so be sure and check the temperatures for your dehydrator.
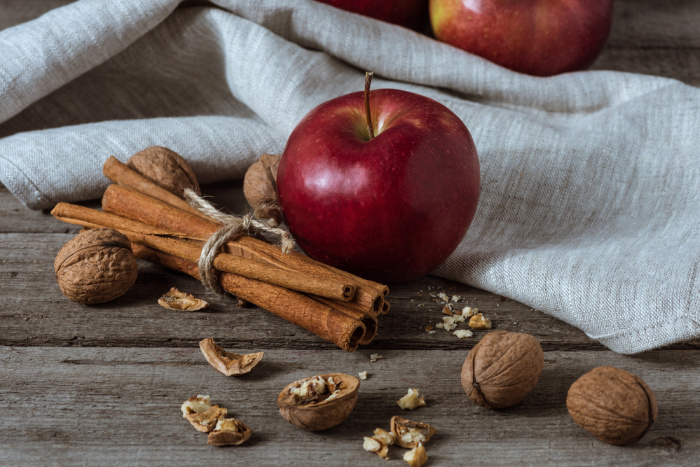
- Apples: wash, pare, core, and slice. I use an apple peeler. Cut in 1/4 inch to 3/8 inch slices. Dip in lemon juice to keep it from browning. Sprinkle with cinnamon, if desired, before dehydrating. Dry at 135 degrees until pliable.
- Apricots: wash, cut in half, remove seeds, and slice into desired thickness. Dry at 135 degrees until pliable.
- Bananas: peel the bananas and cut them into 1/8 inch to 1/4 inch slices. Dip in lemon juice to keep them from browning. Dry at 135 degrees until leathery.
- Blueberries: wash and remove the stems. I didn’t dip my blueberries. I placed them directly on the racks and dehydrated them whole. Dry at 135 degrees until dry and leathery.
- Cherries: Wash, remove pits, and cut them in half. If possible, get a cherry pitter. You can dry them whole, but it’ll take a long time and reduce the quality. Place the cherry halves on the racks or trays skin-side down. Dry at 145 degrees for two hours, then lower the temperature to 135 degrees for the remaining time until leathery.
- Grapes: wash and remove the stems. I don’t boil mine before drying. Dry at 135 degrees until wrinkled and pliable.
- Kiwi: wash, peel, and cut in 1/8 to 1/4 inch slices. Dry at 135 degrees until leathery.
- Peaches: Wash them and remove the pits and skin if desired. I don’t peel mine. Cut them in 1/4 to 3/8-inch slices. Dry at 135 degrees until pliable.
- Pears: wash and peel, if desired. Remove the seeds and stems. Cut in 1/4 to 3/8-inch slices. Dry at 135 degrees until pliable.
- Pineapples: rinse, cut off the leafy crown, peel, and cut off the bad spots. Remove any of the tough sections that are too fibrous to eat. Slice in 1/4 to 1/2 inch slices. Wear gloves if you do several, as pineapple is very acidic. Dry at 135 degrees until pliable.
- Strawberries: Wash and remove the caps/stems and cut into 1/4 to 3/8-inch slices. Using a strawberry slicer makes it a lot easier, and the slices are cut more uniformly. Dry at 135 degrees until leathery and crisp.
Dehydrating Vegetable Tips from Food Storage Mom
- VEGETABLES: (Cut away any bruising or bad spots.) I use an Excalibur dehydrator, so be sure to check the temperatures for your dehydrator.
- Bell peppers (green or red): Wash and remove the stem, seed, and membrane sections. Chop or cut in 1/4-inch circles or slices. Dry at 125 degrees until leathery.
- Cabbage: Wash the head of cabbage and remove the outer leaves. Cut the head into fourths and shred or grate into pieces about 1/8 inch thick. Dry at 125 degrees until brittle.
- Carrots: Wash the carrots, trim the tops, and scrape the skins off. Cut into 1/8-inch chunks or circles. Dry at 125 degrees until leathery.
- Celery: Scrub the stalks to remove dirt. Cut into 1/4-inch strips. Leave the leaves whole. Dry at 125 degrees until the stalks are leathery and the leaves are brittle.
- Cilantro: Wash, chop, and cut the tough stems off. Dry at 115 degrees until brittle.
- Corn: Remove the husks, scrape the corn off the cobs, or buy frozen corn for sale. Place the corn on the racks and dry at 125 degrees until brittle.
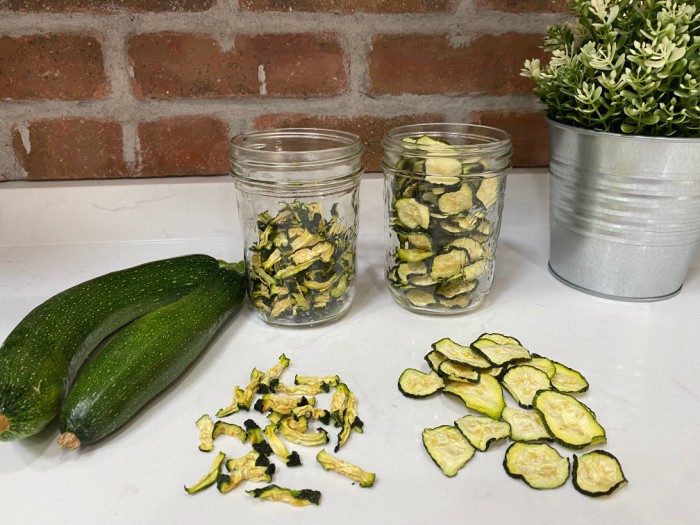
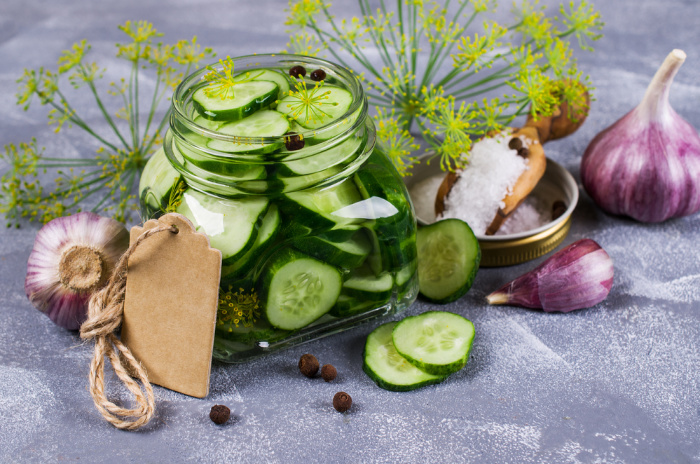
- Cucumbers: Wash, cut the ends off, and remove any bad spots. Slice into 1/4 inch pieces and dry at 135 degrees until brittle.
- Kale: I prefer to buy baby Kale because it is sweeter. Wash the leaves and dry them at 125 degrees until very crisp.
- Mushrooms: Wash or use a brush to clean the dirt off of the mushrooms. Wash in cold water, but don’t soak them. Remove the stems and discard them. Use a mushroom slicer or slice them into 3/8-inch pieces with a knife. Dry at 125 degrees until leathery.
- Onions: I cut the ends off and then cut the onion in half. Remove the outer membrane and discard. Chop in chunks that you would use for casseroles, soups, tacos, etc. Dry at 155 degrees until leathery. I would dehydrate these outside or your entire house will smell like onions for weeks, if not months.
- Peas: Fresh peas are the best, besides the frozen ones you get on sale. Wash and shell the peas and dry them at 125 degrees until brittle.
- Tomatoes: Wash the tomatoes and remove the stems. I dehydrate mine with the skins on because I pulverize them for powder. You can cut the small cherry tomatoes in half and place the skin side down to dry. Slice larger tomatoes 1/4-inch thick and dry at 155 degrees until leathery and brittle.
- Spinach: Wash and remove the bad pieces and discard. I prefer to remove the stems as close as possible. Dry at 125 degrees until crisp and crumbly.
- Zucchini: Wash, cut the ends off, and remove any bad spots. Slice into 1/4-inch pieces and dry at 125 degrees until brittle.
How does dehydrating food save money?
Dehydrating food allows you to preserve surplus produce from your garden or take advantage of sales and discounts on fresh foods. It helps prevent spoilage and waste, ultimately reducing grocery expenses.
What types of food can be dehydrated?
Almost any type of food can be dehydrated, including fruits, vegetables, meats, herbs, and even dairy products like yogurt and cheese.
What equipment do I need to dehydrate food?
You’ll need a food dehydrator, which comes in various sizes and models, or you can use your oven set to the lowest temperature (prop the door open with foil). You’ll need trays or racks to place the food on to dry.
How do I dehydrate food?
Wash and prepare the food, then slice it into uniform pieces for even drying. Arrange the pieces on the dehydrator trays or oven racks, ensuring proper airflow. Set the temperature according to the food being dehydrated and let it dry for the recommended time.
How long does it take to dehydrate food?
The drying time varies depending on the type of food, its moisture content, the humidity in the room, and the drying method. It can range from a few hours to a day or more.
How do I store dehydrated food?
Once the food is completely dehydrated, allow it to cool before storing it in airtight containers, such as jars or vacuum-sealed bags. Store the containers in a cool, dark place like your basement to maximize shelf life.
What is the shelf life of dehydrated food?
Properly dehydrated and stored food can last for several months to a year or more, depending on the type of food and storage conditions.
Can I rehydrate dehydrated food?
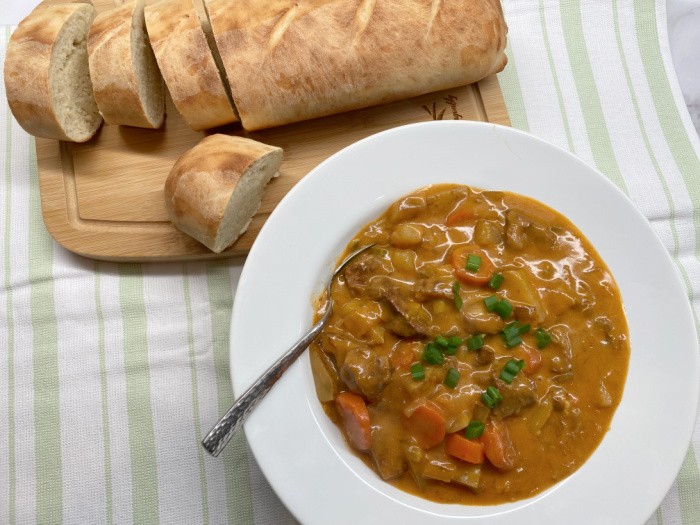
Yes, many dehydrated foods can be rehydrated by soaking them in water or cooking them in liquid. This makes them versatile for use in recipes like soups, stews, and casseroles.
Is it safe to dehydrate food at home?
Yes, it is safe to dehydrate food at home if you follow proper food safety guidelines, such as washing hands and equipment and ensuring the food reaches a sufficient temperature during drying to kill harmful bacteria.
Can I use a pressure canner when I can my food?
I’ve primarily outlined dehydrating food today, but you can use a pressure canner to can food and save time doing so. Pressure canning has become very popular, especially in our hustle-bustle culture. The manufacturer usually provides a canning guide or canning recipe for the various foods to be canned.
If you do start using a pressure canner, be sure to follow the manufacturer’s directions. Also, have the pressure gauge checked and tested at least annually to make sure it’s functioning properly.
Do some people actually use freeze-drying to preserve their food?
As mentioned above, I prefer freeze-dried food for my long-term food storage. There are companies who sell freeze dryers and there are preppers who swear by that method. At my stage in life, I’m not willing to pay the cost to buy one of those units since I’m not sure I’d get back in savings versus buying #10 cans of freeze-dried food.
More Tips
- 15 Tips for Buying Your First Dehydrator
- Dehydrated Foods: Are They Good for You?
- 15 Foods You Should Be Dehydrating
Final Word
Let me know what you like to dehydrate and how you are drying your surplus food, I would love to hear. Thanks for being prepared for the unexpected. I really hope these tips help you out. If you have any tips on food storage, please let me know and I’d be glad to help you. May God Bless this World, Linda


This is a great reminder! I forget about dehydrating produce that I’ve purchased! I only think of it at harvest time.
I have a question. Do you have any tips for using your FoodSaver wide mouth attachment? I usually have only 4 out of 5 seal. My sister-in-law has the same problem ratio and she uses new lids. She even tried boiling the lids the last time she tried it but still had 1 out of every 5 jars not seal. Our jar tops are smooth with no cracks, our lids are smooth with no bumps. I’ve about given up on using it because I don’t trust that the lids will stay sealed for long. Do you have any tips? Thanks!!!
Hi Linnell, let’s figure this out. My jars usually always seal. Do not boil the lids I do not do that. I use the lids over and over and over again. When I take them off to open the jar I very carefully use a bottle opener to pry it off. I will use that same lid over and over. Unless it gets to dented by the bottle opener. I’m guessing that the white deal we put on top of the jar was not on tight enough. I have had that happen. I then push it back on and use the FoodSaver again. The only other thing is if the hose is not pushed in correctly. This has happened to me as well. Sometimes I just jiggle the hose in the white deal and it works. I think you are doing everything correctly. Please keep me posted on this issue. Linda
Hi, I’ve tried dehydrting but have trouble rehydrating to make edible. Is there a trick to it? I cooked dehydrated carrots in crock pot for 10 hours and they were still tough!
Hi Jen, that is not good about cooking the carrots for ten hours. Here’s the deal how old were the dehydrated carrots? Not sure they were too old. I’m thinking out loud here. One thing I do know is that if the liquid is too acidic the dehydrated or fresh vegetables will stop cooking. I try to cook my vegetables AND then add the tomatoes to the chicken broth or whatever. You may need to pressure cook the carrots like old beans. I know people cook really old beans in a pressure cooker to soften them. I doubt there is any food value in those old beans buy hey if we were out of food they would fill the belly. Linda
I use my food saver all the time for powders. Take a muffin paper and put on top of jar.
When I do carrots, or celery I blanch. I make them hard not leathery. I think that might make them last longer.
I like to dehydrate herbs, onions, peppers, and garlic to make my own seasoning mixes.
Hi Shannon, I like to dehydrate those as well! I love hearing you make you own seasonings, you rock! Linda
Love this! It’s because of this post that I even bought a dehydrator.
HI Jess, I can’t wait to hear what you dehydrate first!! Yay!! Linda
Had to laugh at your onion comment ! I put my Excalibur in the garage to dehydrate some onions – then my husband had things to do in the garage. The smell drove him out! Guess I should have warned him!! 🙂
Hi Beth, oh my gosh, the garage, that’s the best story ever! Your husband had to leave the garage!! LOL! Love this, we all learn about onions!! Linda
Love that you dehydrate bananas!! I don’t but then if I buy more than one at a time, I generally have some to toss or freeze or dehydrate! I don’t even like bananas but once in a while, I get a craving for them. BUT again I only buy one at a time!
As for fruit and vegetable powders, I would rather powder as I need so I store the fruit/veggie slices one dehydrated then when I want to add them to recipes or things I am fixing for meals, I powder them at that time. I know there are ways to vacuum seal powders but I am with you, Linda – I cannot afford to replace my FoodSaver! I have sealed cornmeal and flour in the past based on a YouTube video I watched a few years ago. It involved placing those items in a brown paper bag, folding the bag over and using painter’s tape to close it – just one small strip. Then you place the paper bag filled with cornmeal or flour with the fold down into your sealing bag then seal. Not sure how valuable doing that is – how long does it extend the product?
Hi Leanne, wow, the paper bag story, as a Master Canner Preserver I would say no to that. It will not extend the life. Cornmeal is tricky, freezer only or grind as needed. Flour 9-12 months maximum. I know people will say I have used flour stored in a bucket for 15 years. I would trash it, it’s what i have researched. According to the USDA, “unopened all-purpose flour is best used within one year of purchase, and opened flour is best used within six to eight months if stored in the pantry. If refrigerated, flour can last up to a year, and if frozen, it can last up to two years.”
Everyone has a right to their opinion, this quote is how I store my flour. Whole wheat flour is a whole different ball game, much shorter shelf life. Linda