How to Find Other Water Sources in an Emergency
The first thing that I tell preppers to do is stock up on water. The American Red Cross suggests 1 gallon of water per person per day. I recommend you store 4 gallons of water per person per day. Regardless of how well we prepare, there still may be instances where we have insufficient amounts of water. In this case, you will need to know how to find out water sources in an emergency.
Stay Prepared
LifeStraw and another type LifeStraw
WaterBricks
How to Find Other Water Sources
NEVER drink water that has an unusual color or odor! Do not drink it if you suspect it has been contaminated with fuel or toxic chemicals. This type of water can not be made safe to drink. Instead, you can find other water sources both inside your house and outside!
How to Find Other Water Sources Inside Your House
If there is a disaster of some kind, be sure to listen to local officials for advice on water precautions in your home. In the event that water has been contaminated, you will need to shut off the main water valve to your home to prevent contaminants affecting your fixtures. In addition to listening to local officials, here are some ways you can get water inside your home if you have none.
- Inside the Water Heater Tank: Your water heater has a lot of water that it keeps warm for you as you use it. If you have a tank, this water is part of your drinking water system and is safe to drink. This water is okay to drink IF the water HAS NOT been contaminated through your local water lines.
- Ice Cubes: If you have ice cube trays, you can melt the ice cubes and drink the water.
- The Toilet bowl tank: As gross as this sounds, desperate times call for desperate measures. DO NOT DRINK THE BOWL WATER! However, the tank is safe as long as it has not been treated with toilet cleaners like those that change your watercolor. I personally would only use it for hygiene purposes.
- Canned Food: Liquid that is found in your canned food such as fruit and vegetables is safe to drink.
- Swimming pools and spas: DO NOT drink this water. However, you can use this water for taking baths or cleaning yourself.
How to Find Other Water Sources Outside Your House
If you don’t have running water in your house, it could be possible that water sources are contaminated and the pumps have been turned off or are without power. Additionally, if there is a flood, flood waters contaminate well water, rivers, streams, and lakes with livestock waste, human sewages, and chemicals.
When you go for a hunt for water sources outside of your home, you must treat the water before drinking it! Possible ways to get drinking water outside the home include:
- Rainwater: You can easily start collecting rainwater now. I actually found a great source on WikiHow that tells you some great steps on how to collect rainwater with a barrel. It’s worth a read.
- Streams and Rivers: You can get water from moving bodies of water. Make sure you treat the water.
- Ponds and Lakes: Again, getting water from ponds and lakes requires you to treat the water to make it safe to drink. You can however bathe in it.
- Natural Springs: Be sure to check the water for weird colors or odors.
If you think you may have to seek out alternative water sources, I would suggest finding out where those sources are now! Know where the closest river, lake, or pond is. Start collecting rainwater now. You can take steps today that will prepare you in this kind of emergency.
How to Treat Water for Consumption
Water can be contaminated with a variety of microorganisms such as bacteria and parasites. This contamination can cause diseases such as dysentery, cholera, typhoid, and hepatitis. As stated above, water found from outside sources should be treated. According to the CDC, you will want to treat your water in the following ways:
#1 Filter the Water
First, you will want to filter the water to remove any solid particles. You can use a piece of cloth or coffee filter for this.
#2 Boil the Water
You will then want to bring the water to a rapid boil. The water needs to boil for a full minute. If you are at higher altitudes, you will want to boil water for 3 minutes. Boiling water is sufficient in killing pathogenic bacteria, viruses, and protozoa.
#3 Let the Water Cool
You will want to let your water cool for about 30 minutes before drinking. This is because the CDC also recommends treating with chlorine after boiling. If you put chlorine directly in the hot water, it will be useless.
#4 Add Chlorine
Once the water has cooled, you will add 16 drops of liquid chlorine per gallon of water you have. If you have a 2-liter bottle, you will need 8 drops. Let the water sit for another 30 minutes after this.
#5 Check the Water
If the water smells like chlorine, you can drink it. If it does not smell like chlorine, the CDC recommends repeating the step above. After, the 2nd round of chlorine, if it still does not smell like chlorine, you should find another source of water.
Can I Just Boil the Water?
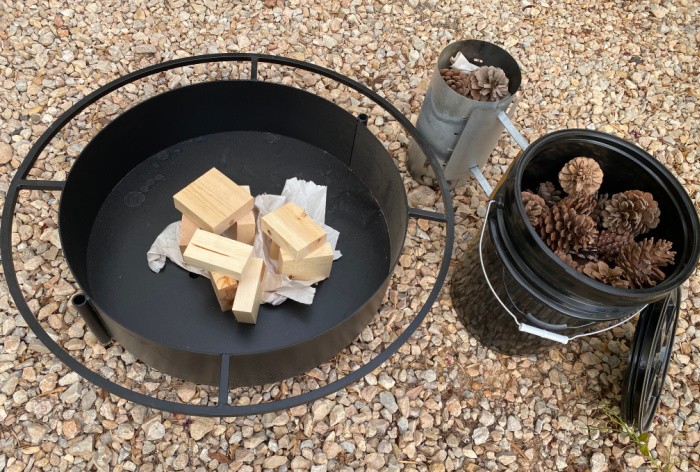
According to the CDC, it is best to do both. However, sources vary on this. The EPA says boiling is sufficient. Therefore, you would not need to treat the water with chlorine after boiling. To prepare to boil your water, make sure you have heating sources or that you know how to start a fire with minimal resources.
Can I Just Use Bleach?
Again, the CDC recommends boiling and using chlorine. However, the EPA says that if you cannot boil your water, using bleach is sufficient. Please only purchase bleach without scents added for your water needs.
Other Disinfection Methods
As with any emergency situation, you may not have bleach, liquid chlorine, or the ability to boil your water. However, you may have other disinfection methods you can use. Here are some other methods you can use, according to the EPA:
Granular Calcium Hypochlorite
This stuff is used to make a chlorine solution. DO THIS IN A VENTILATED AREA AND WEAR EYE PROTECTION. Here’s how you make it:
- Add 1 heaping teaspoon of high-test granular calcium hypochlorite to two gallons of water. (For more information: American Chemistry Council)
- Stir until all particles have dissolved.
Household Iodine
You may have iodine in your cabinet or your first aid kit. To purify water with iodine, you will add 5 drops of 2% tincture of iodine to each quart of water that you are disinfecting. If the water is cloudy or colored afterward, add another 10 drops of iodine. Stir and let the water stand for 30 minutes.
Water Disinfection Tablets
You can find water disinfection tablets that contain chlorine, iodine, chlorine dioxide, or other disinfecting agents online or at local pharmacies and sporting goods stores. You will simply follow the instructions on the product label.
Water Preparedness
Water is crucial to our survival. You can only live about 3 days without water. With that being said, I would recommend stocking water now! In addition, check out some of my other posts on storing and purifying water:
- Bottled Water: Is it Safe to Drink?
- Water: Do You Have Enough Stored?
- Some of the Best Ways to Purify Water
- How to Store Water for Drinking and Cooking
- Storing Water Pros and Cons
- How to Store Water in an Apartment for Survival
Final Word
Even if you are stocking up on water, I would also recommend stocking up on bleach, iodine, and water disinfectant tablets. We never know how long a disaster could last. If we stocked 6 months of water but we didn’t have clean drinking water for 8 months, we would need to find other water sources. Be prepared!
Copyright Images: Water Spring Deposit photos_25642859_s-2019








I have some of the water disinfecting tablets and a couple of life straws. We also invested in a small still to distill water. It will be filtered first. I’ll make the filter out of a 2 liter soda bottle. We have a lake close by. We have adult trikes that we can use to get to the lake and haul the water back. Luckily they are battery operated as well as peddle powered. There is a hill to a d from the lake. LOL We do have some solar panels that we can use to recharge the batteries.
Hi Deborah, it sounds like you are prepared, that’s for sure. Good job, Linda
If your house is raised you can cut the pipe at one of the lower points and usually drain a few gallons into a container. Ask any plumber bout that lol.
Neighbors got an old dually truck that don’t run. We are gonna drag it to the carport and tarp the bed to catch rainwater to filter. Google pickup bed swimming pool.
Hot tubs and swimming pools. Let the chlorine settle a few days then filter it.
On the natural sources like creeks n ponds you need printed maps now beforehand. Figure out how to haul it like a cart or dolly.
Someone needs to be on overwatch while you do it and I suggest doing it at night so your not exposed and too tired to run/fight if needed.
Hi Matt, great ideas on collecting rainwater. The truck idea rocks! Great tips on collecting at night. We have some hidden springs where we live. I’m hoping we can haul water at our age. But we have a lot stored. Great comment as always! Linda
When boiling water – don’t overboil it! In other words, don’t boil for more than the recommended time. The longer you boil the water, the more concentrated things like heavy metals and some chemicals become. All one needs to do is look at their pans after boiling water! That white residue is concentrated metals/chemicals.
When filtering water for the larger particles, it would be best to use an unbleached muslin if at all possible. Even better would be to have some of this fabric dedicated to filtering water and wash it 2-3 times in water as hot as you can get it (i.e. boiling) and dry it in the dryer at the highest heat. This will pre-shrink the fabric and get rid of any sizing that the manufacturer may have put on the fabric. If you can, hem the edges so they don’t unravel. I have done this and have 6 sets in ziplock bags labeled “FOR WATER FILTERING ONLY”. I have them in with all of the other water filtering/treating supplies. I cut the pieces of fabric large enough to cover my largest totes. Also, I got some of those exercise bands and have them with the water supplies to hold the cloth in place on whatever I am using – 5 gallon bucket, large tote, etc.
Something also when thinking about where to collect your water: Once you have maps in hand, look specifically for where homes are, grazing lands, landfills and mark them clearly on the map. You will want to make sure you are not on private property without permission (might get shot) and certainly you want to be upstream from landfills as well as where animals graze or are in constant contact with the stream. Keep in mind also that running water will generally be cleaner than standing water – streams and rivers vs lakes and ponds.
Perhaps we should also be thinking about having a folding wagon and buckets handy for just such an event where we do have to haul water. I have a cart that can haul up to 100 pounds so that is only 2 5 gallon buckets plus 3-4 2 liter bottles. Now I am thinking I might look for something that can handle up to 150 pounds or more.
Hi Leanne, thanks for your awesome comment and insight! I love it! Linda
I think I ran across this one in one of Tom Brown’s survival books. Essentially, it’s low-tech distilling of water, and is possible to do in pretty basic conditions.
First, dig a hole in the soil, somewhere the sun can shine on it. In the center of the hole, place a container–a cup, pot, tin can, something you can keep from tipping–in the middle of the hole. Over the hole, place a sheet of clear plastic, well-secured with stones or other weights around the edge; and slightly loose, so a small pebble placed directly over the cup dips the plastic down over the cup.
The sun will warm things up in your covered hole so water evaporates from the soil, then eventually condenses on the plastic, and runs to the low point and drips into the container. If you place a flexible tube running from the container, out from under the edge of the plastic, you can suck the water directly out without having to uncover the hole every time.
You can pour water from other sources (believe it or not, even urine!) around the hole to continue to moisten the soil. No real need to filter it, since what you collect is “distilled.” It won’t be huge amounts, of course, but certainly could help for one person–or even make several holes.
Hi Rhonda, wow, great comment!! Thank you! I think we all need to learn about different ways to prepare water for drinking and cooking. Thank you! Linda
Use only unscented bleach with do dyes or other additives. Bleach that contains those things can make you very sick. Also, you don’t actually have to boil water to purify it. Heat it to 165 for a minute or two and it is pasteurized and safe. This saves fuel and time waiting for the water to cool. My All American Sun Oven came with a device called a Wapo that is used specifically for pasteurizing water.
Survivor filters website: survivorfilter.com work better than Lifestraws and are easier to use.
But the best and easiest way to purify and filter suspect water is to use an AquaRain 400 system. It’s gravity fed and has no moving parts to break. Best of all it will filter even raw sewage into potable, safe water. website: Aquarain.com
If you don’t have an Aquarain the Big Berket works pretty well too.
I am not associated with any of the products I mentioned in any way other than as a satisfied customer.
Hi Ray, yes, I got that Wapi as well with my Sun Oven. Thanks for the reminder. I really wanted to write this post to let people know about options for water and how to make it drinkable. It’s all about being ready before you need to be. Thanks for sharing the websites. Linda
Thank you for all this wonderful info.
Hi Linda, thank you for your kind words, Linda