Preparing Your Firewood for Winter
As winter approaches, there’s nothing quite like the warmth and comfort of a crackling fire. Whether you’re an experienced wood burner or a newbie, preparing your firewood correctly is essential to making the most of gathering and using that wood. I know many of my readers still use firewood, and I wanted to share tips for organizing your firewood for winter. Preparing for Winter: Emergency Preparedness Checklist
It may seem strange to discuss firewood in the middle of the summer, but from early spring and throughout the summer months many of us are cutting and gathering firewood for use in those colder months. As with so many prepper projects, planning ahead and proper execution are vital for success.
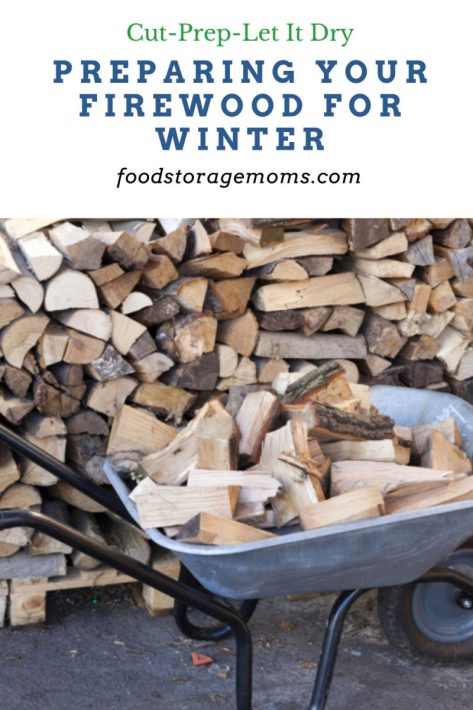
Preparing Your Firewood for Winter
Choose the Right Type of Wood
Not all firewood is created equal! When selecting wood for burning, hardwoods are your best bet. They burn hotter and longer than softwoods, making them perfect for those long, chilly nights. Log Splitter and Heavy Work Gloves
Having the right wood is important. When it comes to a quick start of the fire, those softwoods might prove easier to get things going. But for longer burns and hotter fires, the hardwoods are your best bet.
Best Hardwoods for Firewood:
- Oak – Burns slowly and produces a lot of heat. It’s a bit harder to start, but once it’s going, it’s a powerhouse.
- Maple – Another excellent option, maple burns hot and clean, leaving behind very little ash.
- Hickory – Known for its high heat output, hickory is a favorite among firewood aficionados.
Avoid Softwoods Like:
- Pine – Burns quickly and produces a lot of creosote, which can build up in your chimney.
- Spruce – Like pine, it’s best used for kindling rather than long-term heating.
Cut and Split Your Wood Properly
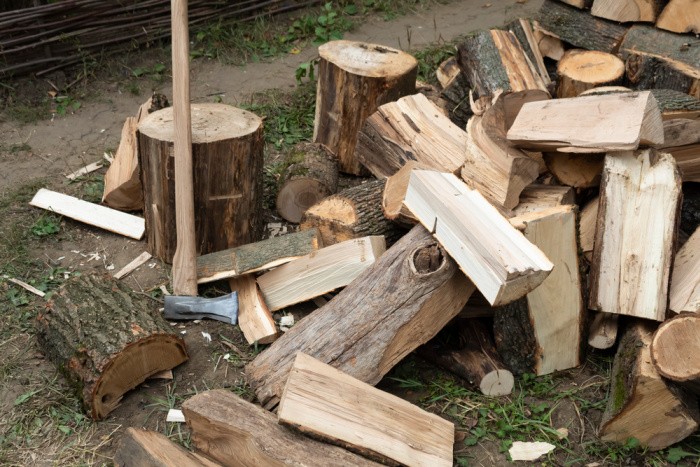
Once you’ve got your wood, it’s time to shape and size it appropriately. Properly cutting and splitting your firewood ensures it dries out effectively and burns efficiently. Yes, making the effort to have split wood takes time, but it’s worth it. Using full logs with more width can prolong the burn time, but you have to have a full fire going to them to burn.
I regular fireplace can handle some fairly long pieces of wood, but if you use a wood-burning stove or fireplace insert you’ll need shorter pieces. Of course, using a sharp chainsaw can save a lot of time cutting the firewood to length and you probably used one to help you gather and cut the wood.
Steps for Cutting and Splitting:
- Cut to Length: Aim for pieces around 16 inches long, a standard size for most fireplaces and wood stoves.
- Split the Wood: Use a maul or a wood splitter to break logs into smaller, manageable pieces. Split the wood to 6-8 inches in diameter for optimal burning. A sharp ax will work too, but it takes more manual labor.
- Pro Tip: Split your wood soon after cutting it. Freshly cut wood is much easier to split and starts drying sooner.
Season Your Firewood
Freshly cut or green wood is full of moisture and doesn’t burn well. Seasoning your wood and letting it dry out for a period is crucial for efficient burning. These tips are essential for preparing your firewood for winter.
How to Season Firewood
- Stack it Properly: To prevent moisture absorption, Stack your wood off the ground, using a pallet or wood rack to keep it elevated.
- Allow Airflow: Create a crisscross pattern or use a single-row stacking method to promote air circulation. This helps the wood dry faster.
- Cover the Top: Use a tarp to protect the top of your woodpile from rain and snow, but leave the sides open to allow moisture to escape.
Aim for at least six months to a year of drying time, depending on the type of wood and your climate.
Test the Moisture Content
Before burning your firewood, it’s essential to check the moisture content to ensure it’s correctly seasoned. Burning wet wood is inefficient and can lead to excess smoke and creosote buildup.
- Moisture Meter: Invest in a moisture meter for an accurate reading. Aim for a moisture content of 20% or less.
- The Knock Test: Tap two pieces of wood together. Your wood is likely dry if you hear a sharp, crackling sound. A dull thud usually indicates it’s still too wet.
Store Your Firewood Correctly
Proper storage is critical to keeping your firewood dry and ready to use. Even if your wood is already seasoned, improper storage can lead to moisture absorption and decreased burning efficiency.
- Location, Location, Location: Store your wood in a dry place that’s well-ventilated. Avoid placing it directly on the ground or against your house, which can invite pests.
- Use a Wood Shed: If you have the space, a wood shed is ideal for keeping your firewood dry and accessible.
- Covering Your Pile: As mentioned earlier, cover the top of your pile to shield it from precipitation, but keep the sides open for airflow.
Know How Much Firewood You Need
Estimating your firewood needs can be tricky, but having enough is crucial for a cozy winter. Too little, and you might find yourself scrambling in the cold. Those who rely on firewood as a fuel source for winter “heaters” will need more wood. We used a fireplace insert to heat our home for two winters many years ago. I was surprised at how much wood we went through.
- Climate: Colder climates require more firewood. For a harsh winter, a family might need 4 to 6 cords of wood.
- Home Size: Larger homes or those with poor insulation will consume more firewood.
- Usage: How often will you be burning? Occasional fires require less wood than using it as a primary heat source.
Firewood Safety Tips
- Wear Safety Gear: When cutting and splitting wood, wear gloves, safety glasses, and sturdy boots to protect yourself from injury.
- Keep Your Chimney Clean: Regularly inspect and clean your chimney to prevent creosote buildup, which can cause dangerous chimney fires. A proper chimney inspection includes checking the damper, making sure it can be opened and closed easily and that it makes a good “seal” when not being used. Check the flue for debris and build-up and remove those as best you can. You may need a professional chimney cleaner from time to time.
- Burn Only Dry Wood: Wet or green wood can create excess smoke and hazardous creosote.
Enjoy Your Cozy Fire
Now that your firewood is ready, it’s time to enjoy the fruits of your labor! There’s nothing better than curling up by the fire with a good book or hot cocoa.
- Start with Kindling: Use smaller pieces of wood and kindling to get your fire going.
- Build a Teepee or Log Cabin: These structures help your fire catch and burn more efficiently.
- Add Larger Logs Slowly: Once your fire is established, add larger logs to keep it burning steadily.
More Firewood Tips
- The Best Way to Dry Firewood Quickly
- What is the Best Firewood for Home Heating?
- 40 Lost Homemaking Skills That Need to Be Refound
Final Word
Remember, a well-prepared firewood stash keeps you warm and ensures your fires burn cleaner and more efficiently. If you’d like to start preparing winter firewood, check out these tips. You’ll appreciate knowing how to prep your firewood this summer so you can get ready for the fall months! May God Bless this World, Linda
Copyright Images: Firewood for Heating Your Home Depositphotos_609981034_S By Olha2117, Firewood In Wheelbarrow Depositphotos_42181627_S By TKphotography











I burn nothing less than 3yr old wood. I leave one rick covered in the winter so I can pull from it if needed. Preparation is key. Move wood inside before the storms.
I don’t split all mine because I throw in large ones before I go to bed so I’ve embers in the morning and it burns throughout the night.
Learn to mix wood such as low temp cottonwood with high temp bodark. Then add smells such as mulberry and pecan for ambiance. Sure you’re trying to stay warm but enjoy it.
Hi Matt, that’s good to know about the 3 years and how you rotate it and keep it covered in the winter. There is nothing better than the smell of wood burning stove or a fireplace! I miss ours! Life is good! Linda
It’s too darn hot to split wood right now or even think about cold weather but with two large dead cedars recently cut into rounds in my yard I know it will have to happen soon. It’s not the best firewood but having already paid to have them cut down I’m not letting it go to waste. Once the heat wave passes I’m going to split a few at a time early in the morning and I found a reasonably priced log rack with a cover to stack the pieces. With a heat pump installed I don’t use as much wood as I did before but it’s best to have a good supply for power outages or as a bit of extra comfort on really cold days. In the meantime I’m going to place the rack where it will add to the privacy of a patio. Two for one! Sure hope there are fewer sleeping wasps among the firewood this time around. Last winter I had to bang each piece of wood hard before loading up for the house. Also dropped a few large spiders and other critters so now it’s standard practice.
HI Alice, yes, that’s a win win for sure having a little patio privacy. Those darn wasps are so scary! You never know whats in the stack of wood, we always had to look for black widows. Life is good to have a back up thats for sure. Linda
Alice if you ever get stung by most types of wasps, dab it with a paper towel saturated with any liquid containing an acid such as soda pop, orange juice, vinegar, etc. The venom of the wasp, yellow jacket or hornet is basic by nature, so the acid neutralizes it. I have used the remedy many times and it works very quickly to stop the pain, if you get it on soon.
For a bee sting, since their venom is acidic, use a baking soda and water paste to stop the pain. It also works on bullheads if you ever get nailed by their stinger as I have. Which to use on what is sometimes hard to recall. For me to remember that, I use this simple key: BBB stands for the well known Better Business Bureau, but for me BBB stands for ‘Bees, Bullheads use Baking soda . . . the other stings use the acid stuff. Be aware there is one type of wasp that requires the basic treatment, but I haven’t met it yet. If you use the acid first and don’t get rapid relief, like pain gone in 5 minutes, then try the basic approach.
Hi Alan, this is great information on the different bee stings, thank you! Linda
When we lived in the mountains of Colorado I had to burn pine, aspen, fir and spruce for the most part. Smelled great but even if left to dry for 3 years the creosote build up was fierce. Annual stove pipe/chimney cleaning was a must. Like Matt I kept a few cords covered with heavy canvas tarps. The cords of wood were also piled on pallets to keep them off the ground. I kept meaning to build a woodshed but other projects took priority and the tarps worked fine.
Hi Ray, here is Utah that’s what we used to burn, Aspen mainly. Yeah we had to clean our chimney every single year. I still miss those wood burning stoves. Linda